• Skip to primary navigation
  • Skip to main content
  • Skip to primary sidebar
Create Bake Make
  • Home
  • Recipes
    • Biscuits and Cookies
    • Cakes and Muffins
    • Lunchbox Ideas
    • Slices
    • Dinners
    • Desserts
    • Snacks & Treats
    • Cheesecake
    • Breakfast
    • Party Food
    • Easter
    • Christmas
  • Thermomix
    • Thermomix Biscuits
    • Thermomix Cakes and Muffins
    • Thermomix Dinners
    • Thermomix Desserts
    • Thermomix Lunch Box Snacks
    • Thermomix Slices
    • Thermomix Easter Recipes
    • Thermomix Christmas Recipes
  • Food for Kids
  • SHOP
  • About
    • Facebook
    • Instagram
    • Pinterest
    • RSS
    • Twitter
menu icon
go to homepage
  • Lunchbox Ideas
  • Dinners
  • Thermomix Recipes
  • Sweet
  • All Recipes
  • Shop
    • Facebook
    • Instagram
    • Pinterest
  • subscribe
    search icon
    Homepage link
    • Lunchbox Ideas
    • Dinners
    • Thermomix Recipes
    • Sweet
    • All Recipes
    • Shop
    • Facebook
    • Instagram
    • Pinterest
  • ×
    • Two Chocolate Snickers Brownies sitting on top of each other.
      Snickers Chocolate Brownies
    • Biscoff Cheesecake
    • Overhead view of corn relish dip in a blue bowl surrounded by crackers.
      Corn Relish Dip
    • Cheese Sauce dripping from a silver spoon into a bowl.
      Thermomix Cheese Sauce
    • Slice of Focaccia on a white bench. In the background are more slices of Focaccia.
      Thermomix Focaccia
    • Two slices of biscoff brownies on top of each other. in the background in a jar of biscoff.
      Biscoff Brownies
    • Side view of Thermomix zucchini slice on a green plate
      Thermomix Zucchini Slice
    • Close up of Curried Eggs topped with chives on a blue plate.
      Curried Eggs
    • Two Margaritas made using a thermomix in glasses garnished with salt and lime.
      Thermomix Margaritas
    • Side view of Cranberry and Brie Puff Pastry Star with a piece of brie removed
      Cranberry and Brie Puff Pastry Star
    • Close up of a piece of Biscoff Fudge on a sheet of baking paper. In the background is more fudge and jar of Biscoff spread.
      Biscoff Fudge
    • Slice of Vanilla Sheet Cake sitting in front of a wire rack.
      Vanilla Sheet Cake
    Create Bake Make / Slices / Cherry Ripe Slice

    Cherry Ripe Slice

    Published: Oct 26, 2018 · Modified: Jan 7, 2022 by Lauren Matheson ·

    6897 shares
    • Share
    • Tweet
    Jump to Recipe Print Recipe

    This classic Cherry Ripe Slice is just like the slice you grew up with! It is melt and mix slice recipe that takes just 15 minutes to prepare before popping it into the fridge to set. This slice is perfect for special occasions, dessert or cake stalls and it can be made up to one week before you need it. Both regular and Thermomix instructions included.

    Two pieces of cherry ripe slice stacked on top of each other.

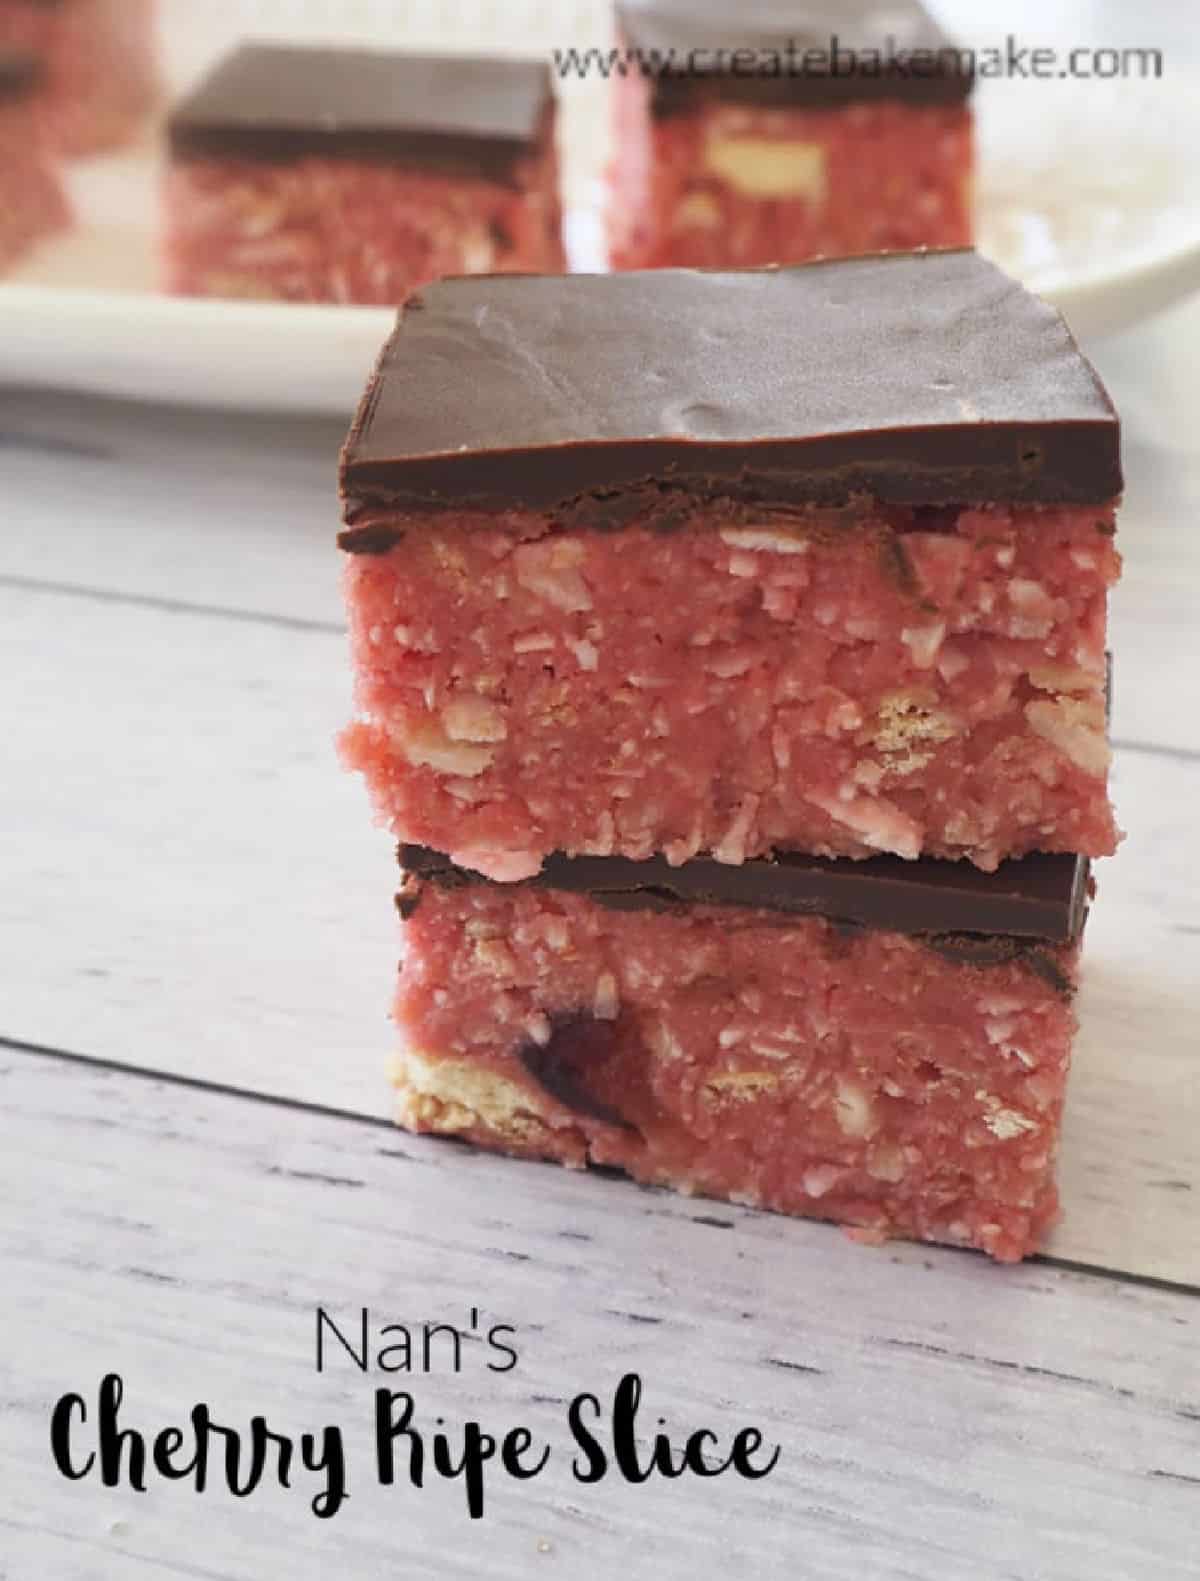
    When it comes to classic slice recipes, you just cannot go past my Nan’s Classic Cherry Ripe Slice recipe.  Nan used to make this slice for special occasions when we were growing up and I honestly thought it was the fanciest slice going around!

    Why you will love this recipe:

    • Melt and Mix – all you need to do is melt the butter and mix in the remaining ingredients to make this slice.
    • Quick to prepare – this slice takes just 15 minutes to prepare before placing into the fridge to set.
    • Make ahead – you can make this Cherry Ripe slice up to seven days before you need it.
    • Freezer friendly – this slice can be frozen without the chocolate layer.
    close up of pieces of cherry ripe slice on a white plate.

    Ingredients

    Although I’m also a big fan of my No Bake Cherry Ripe Slice recipe, this classic Cherry Ripe Slice is just that little bit special thanks to being loaded with:

    • Glace cherries,
    • Marie Biscuits,
    • Desiccated coconut
    • Sweetened condensed milk
    • Butter
    Side view of Two pieces of cherry ripe slice stacked on top of each other.

    Tips for Making Cherry Ripe Slice

    • I made this Cherry Ripe Slice in a 20cm square cake tin to help make it a little bit higher (and give you more slice in each piece!), however you can also make it in a conventional 28x18cm slice tin too.
    • You can omit the pink food colouring if you wish, however this is what gives the slice it’s pink colouring.
    • It is important to use sweetened condensed milk and not evaporated milk for this recipe.
    • The slice mixture will be sticky – this is normal!
    • Milk chocolate can be used in place of dark chocolate.
    • Once made, this Cherry Ripe Slice is best stored in an airtight container in the fridge for up to 7 days – however good luck getting it to last that long! 

    More Easy Slice Recipes:

    • Mars Bar Slice
    • Rice Bubbles and Honey Slice
    • Nut Free Muesli Slice | Great for Lunch Boxes
    • Easy Caramel Slice
    • Weet-Bix Slice Recipe
    • No Bake Passionfruit Slice
    • Easy Peppermint Slice
    • No Bake Malteser Slice
    • Chocolate Slice
    Two pieces of cherry ripe slice stacked on top of each other.

    Cherry Ripe Slice

    This classic Cherry Ripe Slice recipe is just like the Cherry Ripe Slice you grew up with! It's an easy no bake slice recipe and also includes Thermomix instructions too. 
    4.45 from 27 votes
    Print Recipe Pin Recipe
    Prep Time 15 minutes mins
    Chilling Time 2 hours hrs
    Total Time 2 hours hrs 15 minutes mins
    Course Slices
    Cuisine Australian
    Servings 16 pieces
    Calories 376 kcal

    Equipment

    • 1 20 cm square baking tin You can also use a 28x18cm slice tin

    Ingredients
      

    • 110 grams butter melted
    • 395 grams sweetened condensed milk one tin
    • 250 grams Marie Biscuits or similar plain biscuit
    • 200 grams glace cherries finely chopped
    • 3 cups dessicated coconut 255 grams
    • 4 drops pink food colouring
    • 200 grams dark chocolate melted
    • 1 tablespoon coconut oil optional

    Instructions
     

    • Line the base and sides of a 20cm square cake tin with baking paper – making sure you leave paper hanging up the sides of the tin to help you remove the slice once it has set.
    • Crush the biscuits until they form small pieces and place in a large bowl.
    • Add the melted butter, cherries, coconut and pink colouring and mix until well combined.
    • Transfer to your prepared tin and use the back of a spoon to flatten the top of the mixture – don’t worry, it will be sticky!
    • Place the dark chocolate and coconut oil (if using) into a microwave safe bowl and cook on 30 second spurts until it’s just melted. 
    • Pour the melted chocolate over the top of the slice and place into the fridge for 3 hours or until set. Once set, cut into pieces and store in an airtight container in the fridge for up to 7 days.

    Thermomix Instructions

    • Line the base and sides of a 20cm square cake tin with baking paper – making sure you leave paper hanging up the sides of the tin to help you remove the slice once it has set.
    • Place the butter into your Thermomix bowl and cook for 3 minutes, 60 degrees, speed 2 to melt.
    • Add the biscuits into your Thermomix bowl and mix for 3 seconds on speed 5 to lightly crush. You will need to use your spatula to push the biscuits down into the blades.
    • Add the condensed milk, coconut, pink colouring and cherries and mix for 10 seconds, speed 4. Scrape down the sides of your Thermomix bowl and mix for a further 10 seconds, speed 5 – REVERSE or until the mixture is well combined.
    • Transfer to your prepared tin and use the back of a spoon to flatten the top of the mixture – don't worry, it will be sticky!
    • Place the dark chocolate and coconut oil (if using) into a microwave safe bowl and cook on 30 second spurts until it's just melted. 
    • Pour the melted chocolate over the top of the slice and place into the fridge for 3 hours or until set. Once set, cut into pieces and store in an airtight container in the fridge for up to 7 days.

    Notes

    • I made this Cherry Ripe Slice in a 20cm square cake tin to help make it a little bit higher (and give you more slice in each piece!), however you can also make it in a conventional 28x18cm slice tin too.
    • You can omit the pink food colouring if you wish, however this is what gives the slice it’s pink colouring.
    • It is important to use sweetened condensed milk and not evaporated milk for this recipe.
    • The slice mixture will be sticky – this is normal!
    • Milk chocolate can be used in place of dark chocolate.
    • The addition of coconut oil will assist the chocolate layer from not cracking when slicing.
    • Once made, this Cherry Ripe Slice is best stored in an airtight container in the fridge for up to 7 days – however good luck getting it to last that long! 

    Nutrition

    Calories: 376kcalCarbohydrates: 45gProtein: 5gFat: 20gSaturated Fat: 15gPolyunsaturated Fat: 1gMonounsaturated Fat: 3gTrans Fat: 1gCholesterol: 10mgSodium: 122mgPotassium: 298mgFiber: 5gSugar: 29gVitamin A: 82IUVitamin C: 1mgCalcium: 95mgIron: 3mg
    Keyword Cherry Ripe Slice, Thermomix Cherry Ripe Slice
    Tried this recipe? Please leave a rating and tag me on Instagram! Mention @createbakemake or tag #createbakemake!

    Looking for more?

    You can find more slice recipes in our Slices books and eBooks. Shop the full range here.

    ThermoBliss 11 book complete set
    « Gingerbread Pavlova
    45 Make Ahead Lunchbox Ideas »

    Filed Under: Celebration Food, Christmas, Desserts, Party Food, Slices, Snacks & Treats, Thermomix

    Reader Interactions

    Comments

    1. Susie Mackay

      November 05, 2020 at 9:58 pm

      Oh my. I have made a cherry and chocolate tiffin with everything mixed together – but the chocolate layer idea looks awesome. I’m British, but having lived in Australia I really miss Cherry Ripe. Must try this, as they are expensive to buy over here.

      Reply
    2. Kyleigh

      May 23, 2020 at 1:27 pm

      Hi just wondering do you think choc ripple biscuits would work in place of the Marie biscuit?

      Reply
      • Lauren Matheson

        May 31, 2020 at 8:21 pm

        Yes, for sure!

        Reply
    3. Kate

      December 22, 2019 at 4:49 pm

      I was making these and I noticed that the condensed milk was not included in the recipe on the first version. In excited to taste them!

      Reply
    4. Tracy

      June 13, 2019 at 9:15 pm

      5 stars
      Love this slice, even converted the non cherry ripe fans. just wondering if it is freezer friendly please.

      Reply
      • Lauren Matheson

        June 14, 2019 at 6:15 am

        Hi Tracy, That’s so great to hear 🙂 It’s freezer friendly if frozen without the chocolate layer xx

        Reply
    5. Lu

      February 18, 2019 at 6:29 pm

      Hi Lauren

      Can you use fresh frozen cherries for this recipe?

      Thanks

      Lu

      Reply
      • Lauren Matheson

        February 19, 2019 at 11:21 am

        Hi Lu, I haven’t tried this recipe with fresh/frozen cherries before but I think it should be ok xx

        Reply
    4.45 from 27 votes (25 ratings without comment)

    Leave a Reply Cancel reply

    Your email address will not be published. Required fields are marked *

    Recipe Rating


    Primary Sidebar

    Lauren placing sprinkles onto cupcakes in her kitchen

    Hi, I'm Lauren! As a Mum of three VERY hungry boys, I know what it’s like to need dinner on the the table FAST. All of my recipes are made using simple ingredients and you will also find both conventional and Thermomix cooking instructions.

    More about me →

    Lunchbox Snacks

    • three pieces of anzac slice stacked on top of each other.
      Anzac Slice

    • Condensed Milk Cookies Stacked in a pile
      Condensed Milk Cookies | Makes 100 Biscuits!

    • stack of banana pikelets on plate
      Easy Banana Pikelets Recipe

    • 3 Ingredient Marshmallow Rice Bubble Slice sitting on a white decorative platter.
      3 Ingredient Rice Bubble Bars Recipe

    Simple Family Dinners

    • spoon holding a baked chicken parma ball.
      Chicken Parma Balls

    • Creamy Chicken Pie cut in half on plate
      Creamy Chicken Pies | Homemade Chicken Pie Recipe

    • Roast Chicken on wooden board
      Air Fryer Roast Chicken | An Easy Family Friendly Dinner

    • Overhead view of two beef rissoles with a side of coleslaw on a grey speckled plate.
      Beef Rissoles

    Thermomix Recipe Books

    ThermoBliss 11 book complete set

    Browse the full range of books and eBooks here.

    Footer

    ↑ back to top

    About

    • About Me
    • Privacy Policy

    Newsletter

    • Sign Up! for emails and updates

    Contact

    • email: hello@createbakemake.com

    Copyright © 2024 Create Bake Make

    Please note that the content including images and recipes contained within the Create Bake Make website and recipe books are protected by copyright 2024. Adding and/or sharing of content from the Create Bake Make website or recipe books to third party websites or platforms is prohibited.

    Foodie Pro on the Foodie Pro Theme

    Rate This Recipe

    Your vote:


    A rating is required
    A name is required
    An email is required

    Recipe Ratings without Comment

    Something went wrong. Please try again.