• Skip to primary navigation
  • Skip to main content
  • Skip to primary sidebar
Create Bake Make
  • Home
  • Recipes
    • Biscuits and Cookies
    • Cakes and Muffins
    • Lunchbox Ideas
    • Slices
    • Dinners
    • Desserts
    • Snacks & Treats
    • Cheesecake
    • Breakfast
    • Party Food
    • Easter
    • Christmas
  • Thermomix
    • Thermomix Biscuits
    • Thermomix Cakes and Muffins
    • Thermomix Dinners
    • Thermomix Desserts
    • Thermomix Lunch Box Snacks
    • Thermomix Slices
    • Thermomix Easter Recipes
    • Thermomix Christmas Recipes
  • Food for Kids
  • SHOP
  • About
    • Facebook
    • Instagram
    • Pinterest
    • RSS
    • Twitter
menu icon
go to homepage
  • Lunchbox Ideas
  • Dinners
  • Thermomix Recipes
  • Sweet
  • All Recipes
  • Shop
    • Facebook
    • Instagram
    • Pinterest
  • subscribe
    search icon
    Homepage link
    • Lunchbox Ideas
    • Dinners
    • Thermomix Recipes
    • Sweet
    • All Recipes
    • Shop
    • Facebook
    • Instagram
    • Pinterest
  • ×
    • Two Chocolate Snickers Brownies sitting on top of each other.
      Snickers Chocolate Brownies
    • Biscoff Cheesecake
    • Overhead view of corn relish dip in a blue bowl surrounded by crackers.
      Corn Relish Dip
    • Cheese Sauce dripping from a silver spoon into a bowl.
      Thermomix Cheese Sauce
    • Slice of Focaccia on a white bench. In the background are more slices of Focaccia.
      Thermomix Focaccia
    • Two slices of biscoff brownies on top of each other. in the background in a jar of biscoff.
      Biscoff Brownies
    • Side view of Thermomix zucchini slice on a green plate
      Thermomix Zucchini Slice
    • Close up of Curried Eggs topped with chives on a blue plate.
      Curried Eggs
    • Two Margaritas made using a thermomix in glasses garnished with salt and lime.
      Thermomix Margaritas
    • Side view of Cranberry and Brie Puff Pastry Star with a piece of brie removed
      Cranberry and Brie Puff Pastry Star
    • Close up of a piece of Biscoff Fudge on a sheet of baking paper. In the background is more fudge and jar of Biscoff spread.
      Biscoff Fudge
    • Slice of Vanilla Sheet Cake sitting in front of a wire rack.
      Vanilla Sheet Cake
    Create Bake Make / Slices / Peanut Butter Rice Bubble Slice

    Peanut Butter Rice Bubble Slice

    Published: Mar 12, 2015 · Modified: Aug 14, 2023 by Lauren Matheson ·

    3066 shares
    • Share
    • Tweet
    Jump to Recipe Print Recipe

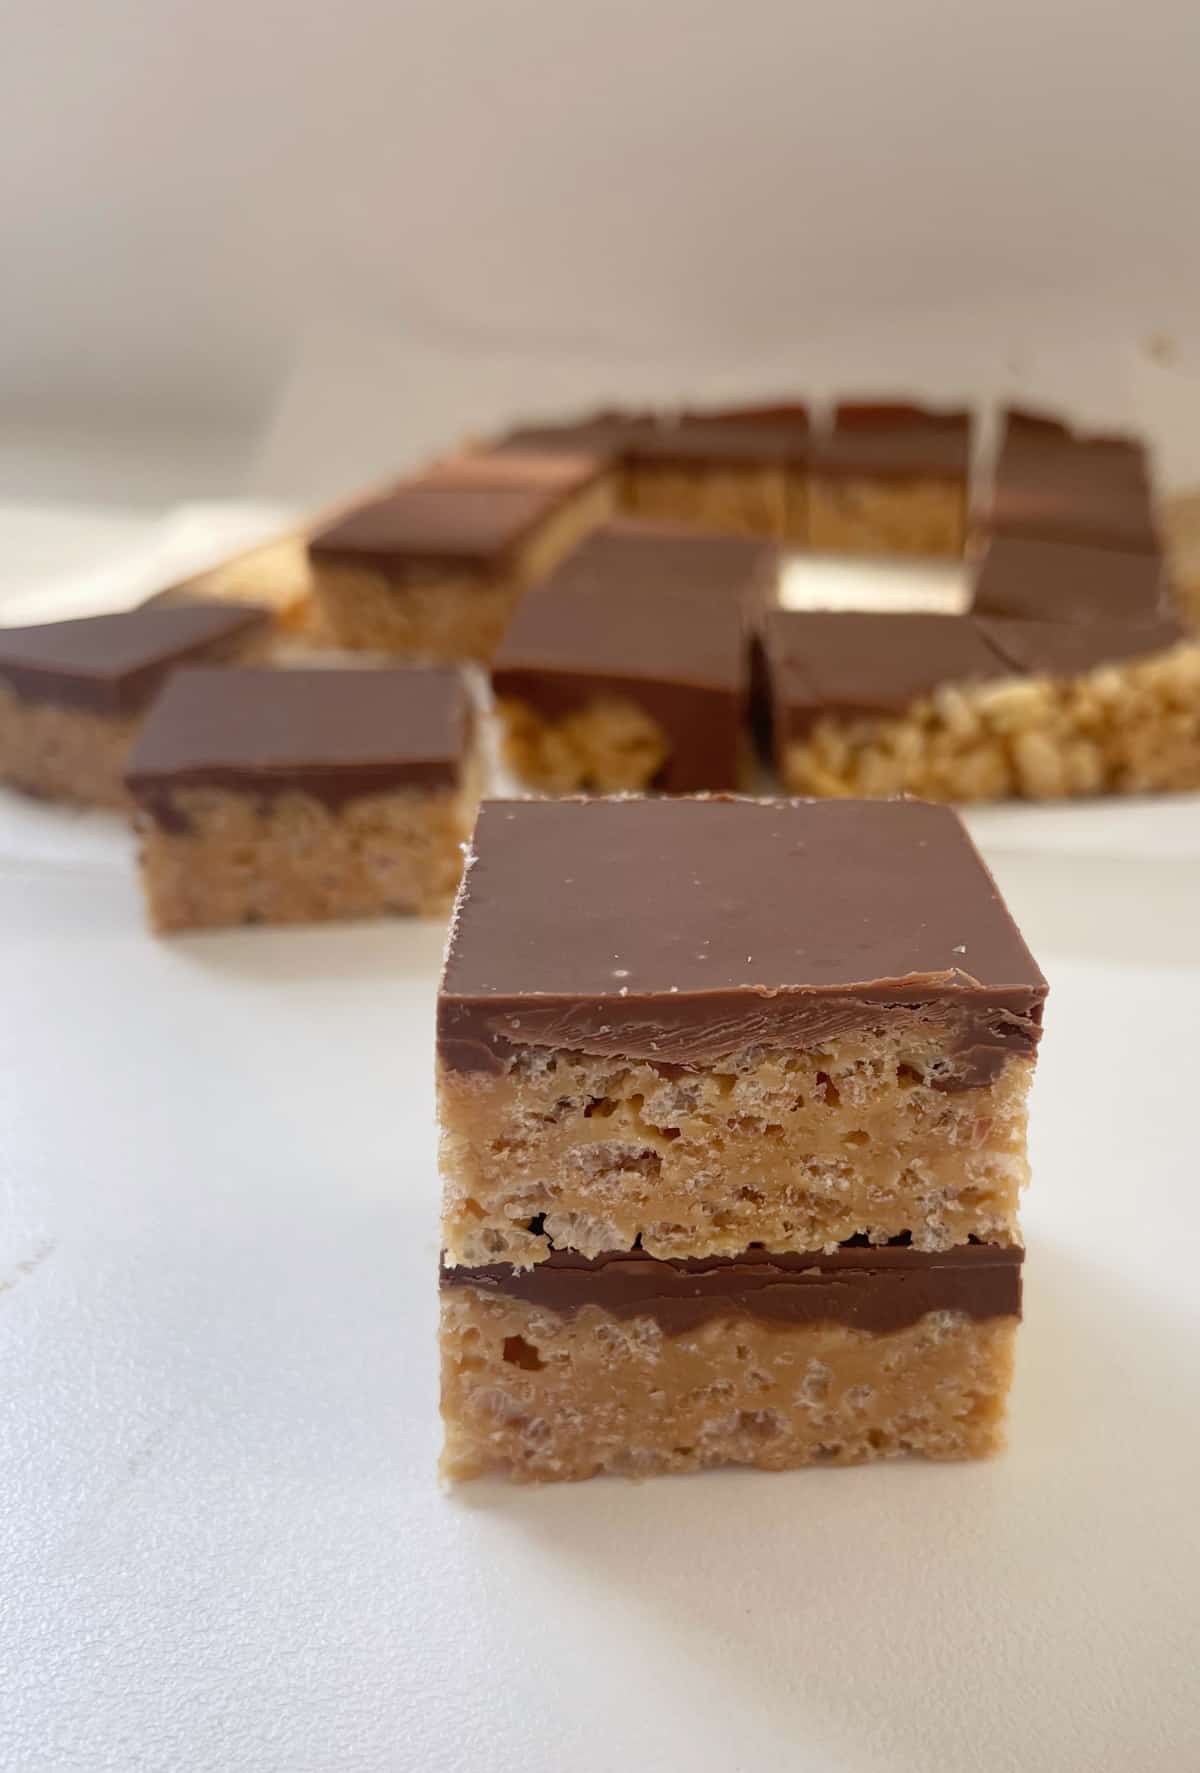
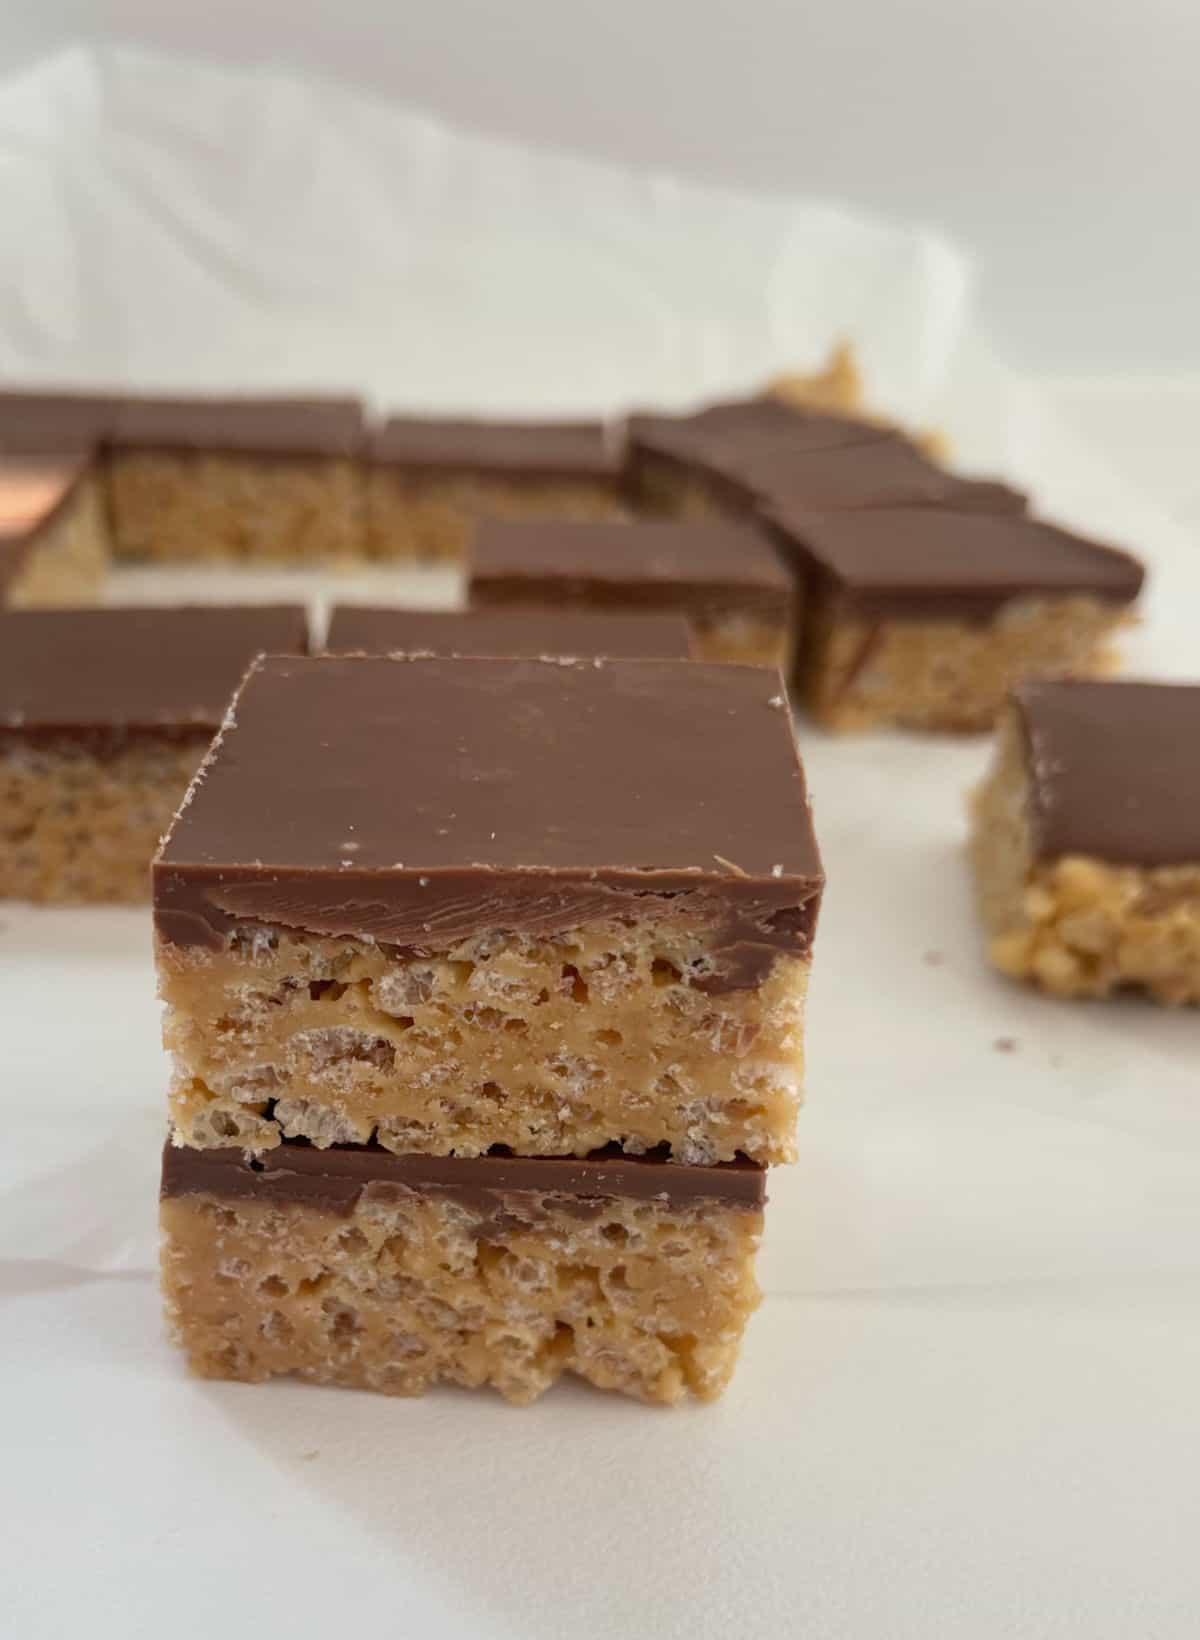
    Made with just FOUR ingredients, this Peanut Butter Rice Bubble Slice couldn’t be easier to make! This recipe is based on my easy Rice Bubble Bars recipe, and takes under 10 minutes to prepare.

    Two pieces of peanut butter rice bubble slice sitting on top of each other on a white backdrop.

    This sweet slice is the perfect treat or easy dessert!

    You will love:

    Quick to prepare – this slice can be ready to go into the fridge in under 10 minutes.

    Four ingredients – yes, you read that right! You just need four simple ingredients to make this Peanut Butter Rice Bubble Slice.

    No Bake – simply heat the peanut butter and honey until combined, no oven is needed!
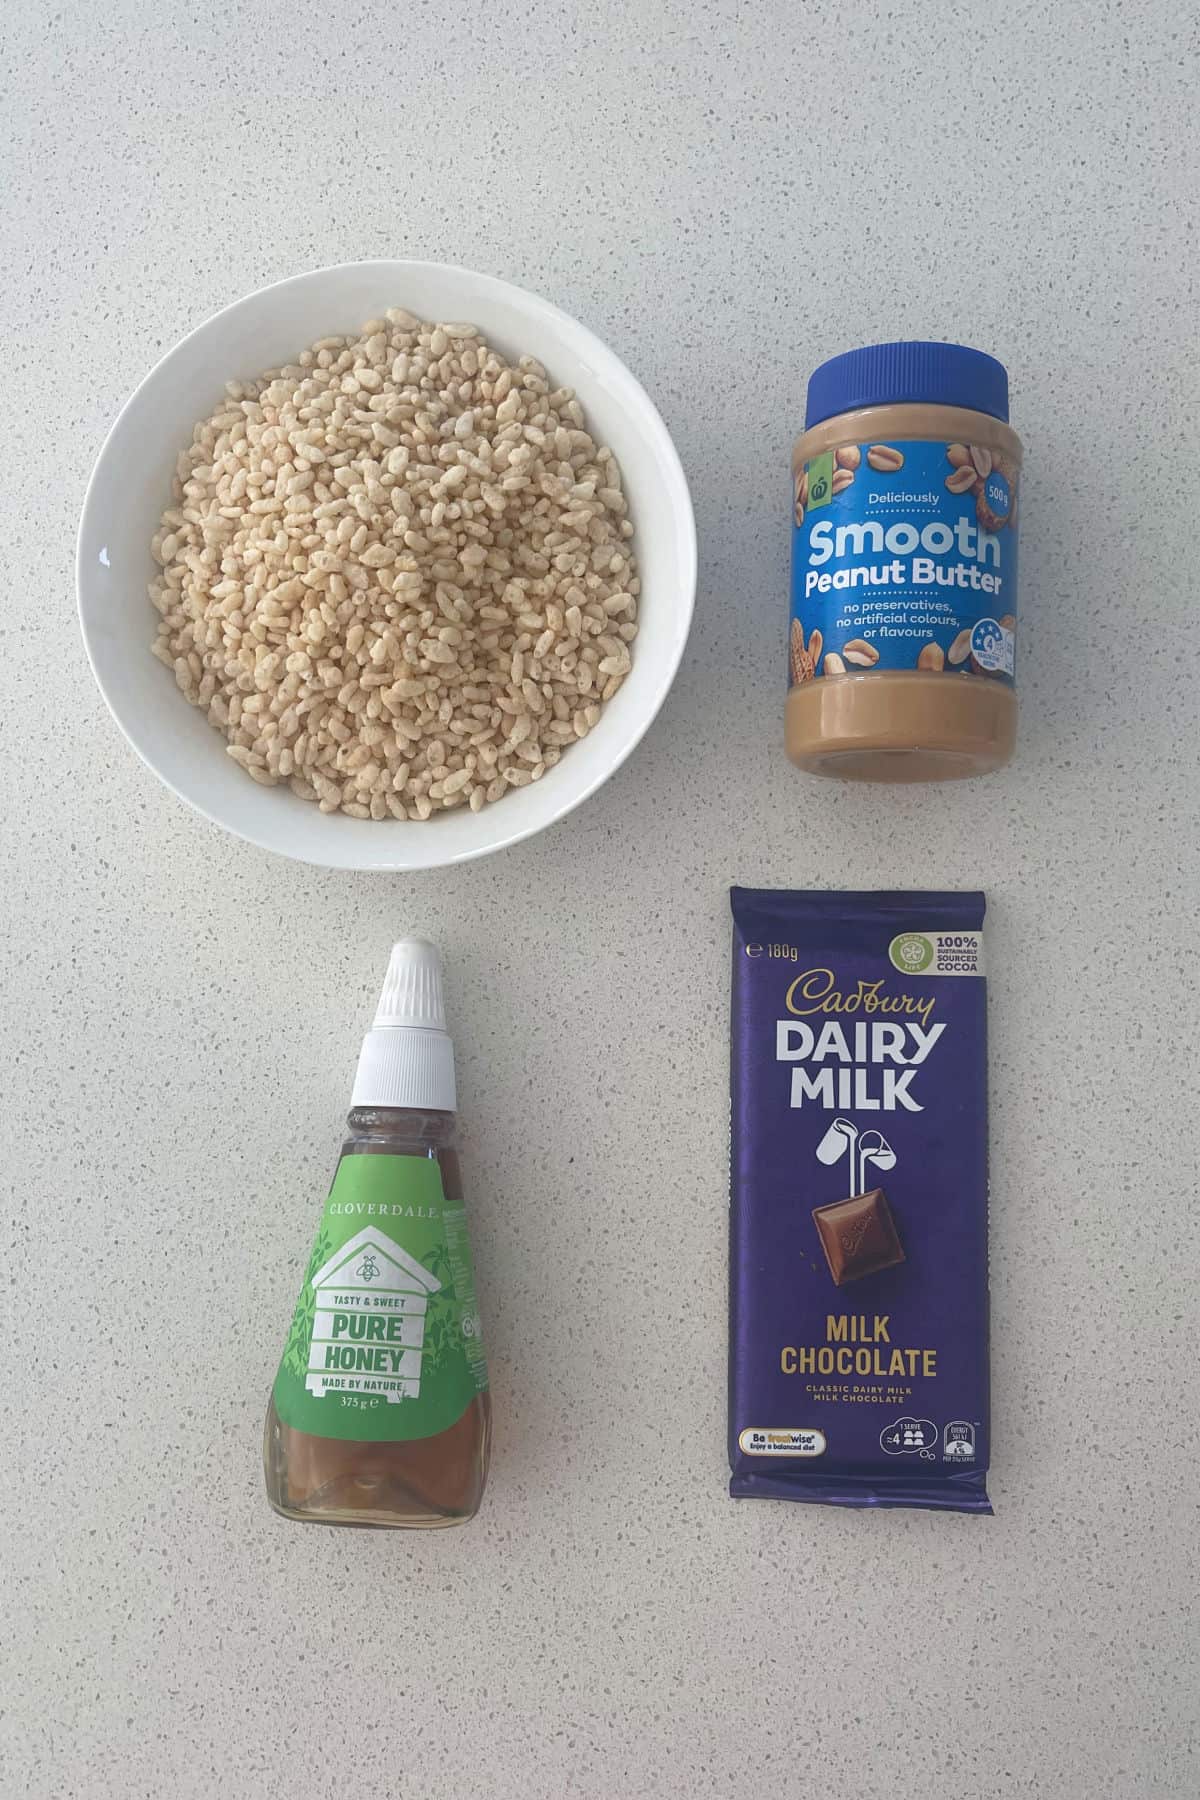
    Adult holding a piece of peanut butter rice bubble slice.

    Ingredients

    Please note you will find a full list of ingredients and the cooking method (both regular and Thermomix) in the recipe card below.

    • Peanut Butter – I recommend using smooth peanut butter.
    • Rice Bubbles – use any brand.
    • Honey – substitute with rice malt syrup if preferred.
    • Chocolate – milk or dark chocolate can be used.
    Ingredients to make peanut butter rice bubble slice.

    Method:

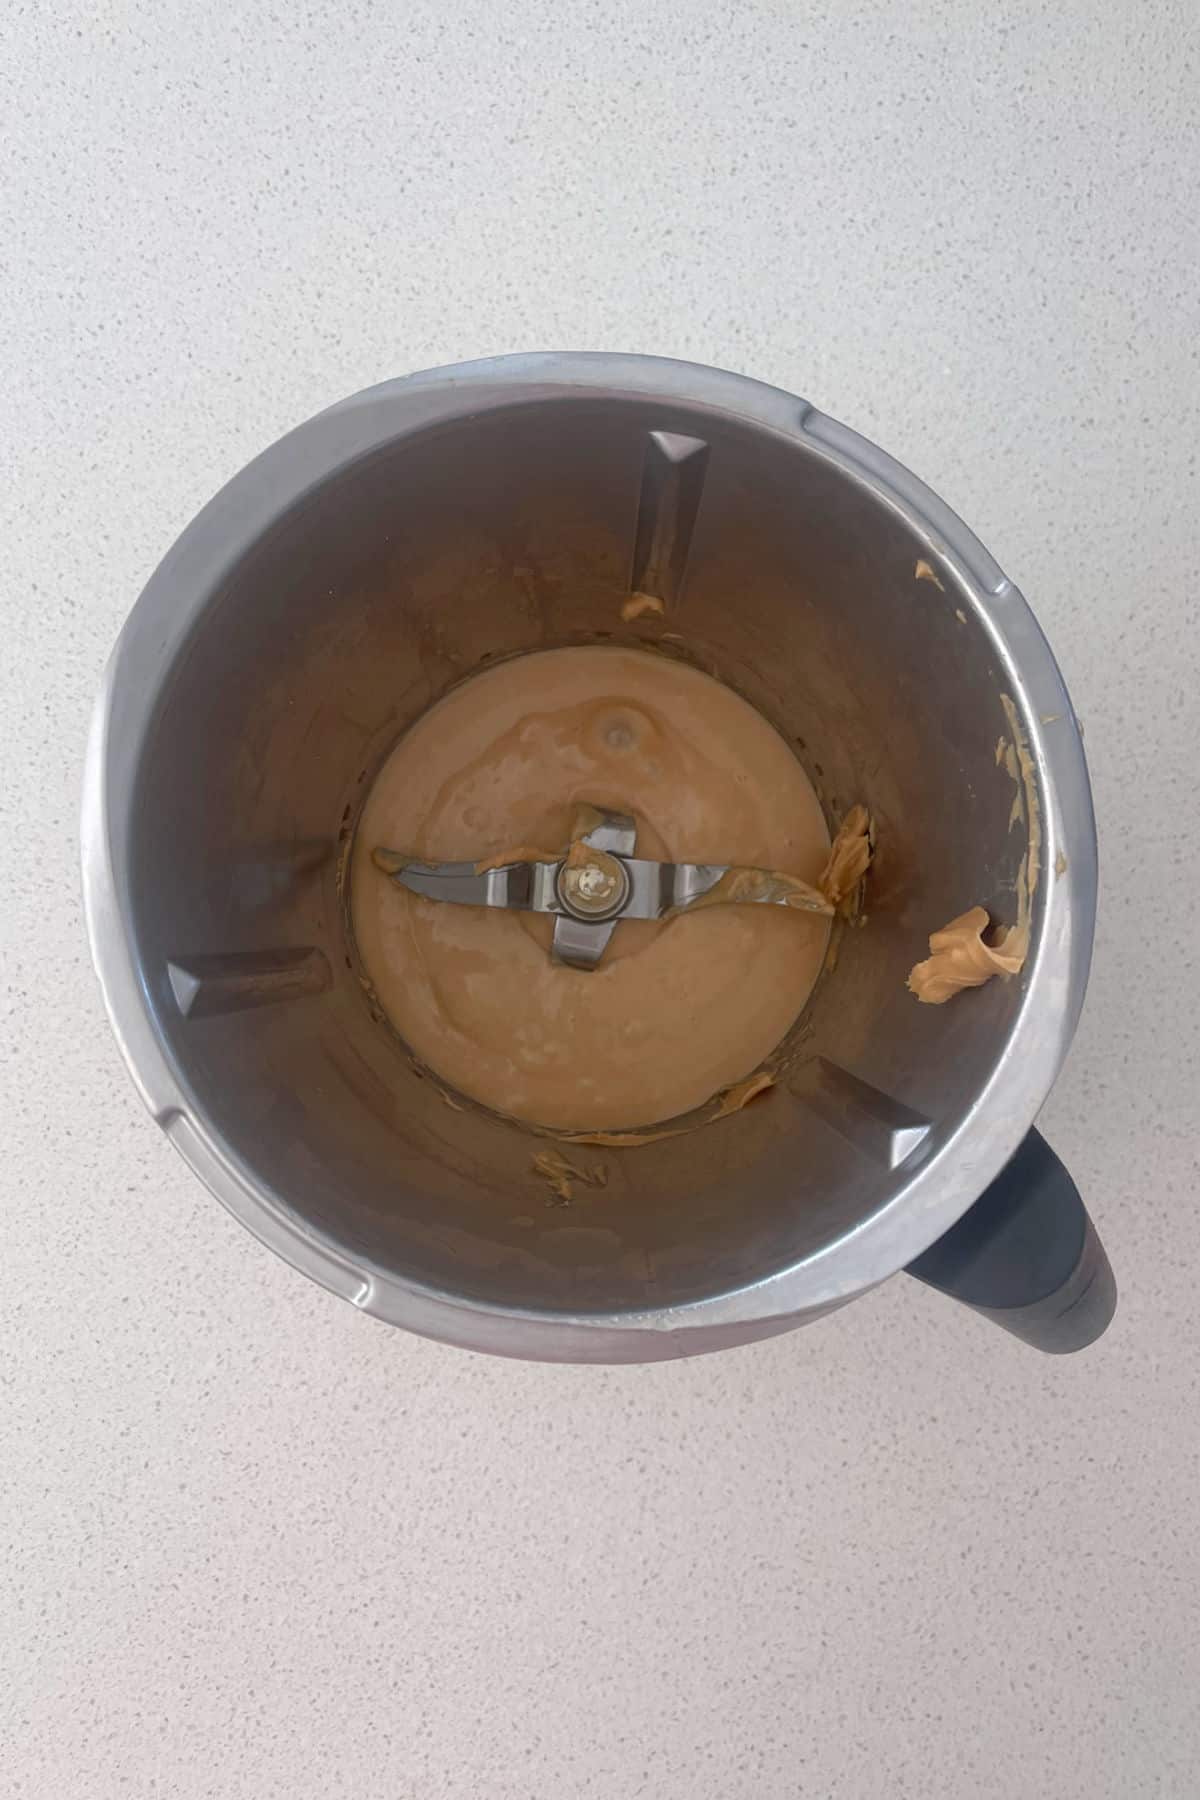
    Step 1. Heat the peanut butter and honey until soft and both ingredients have combined.

    Melted peanut butter and honey in a thermomix bowl.

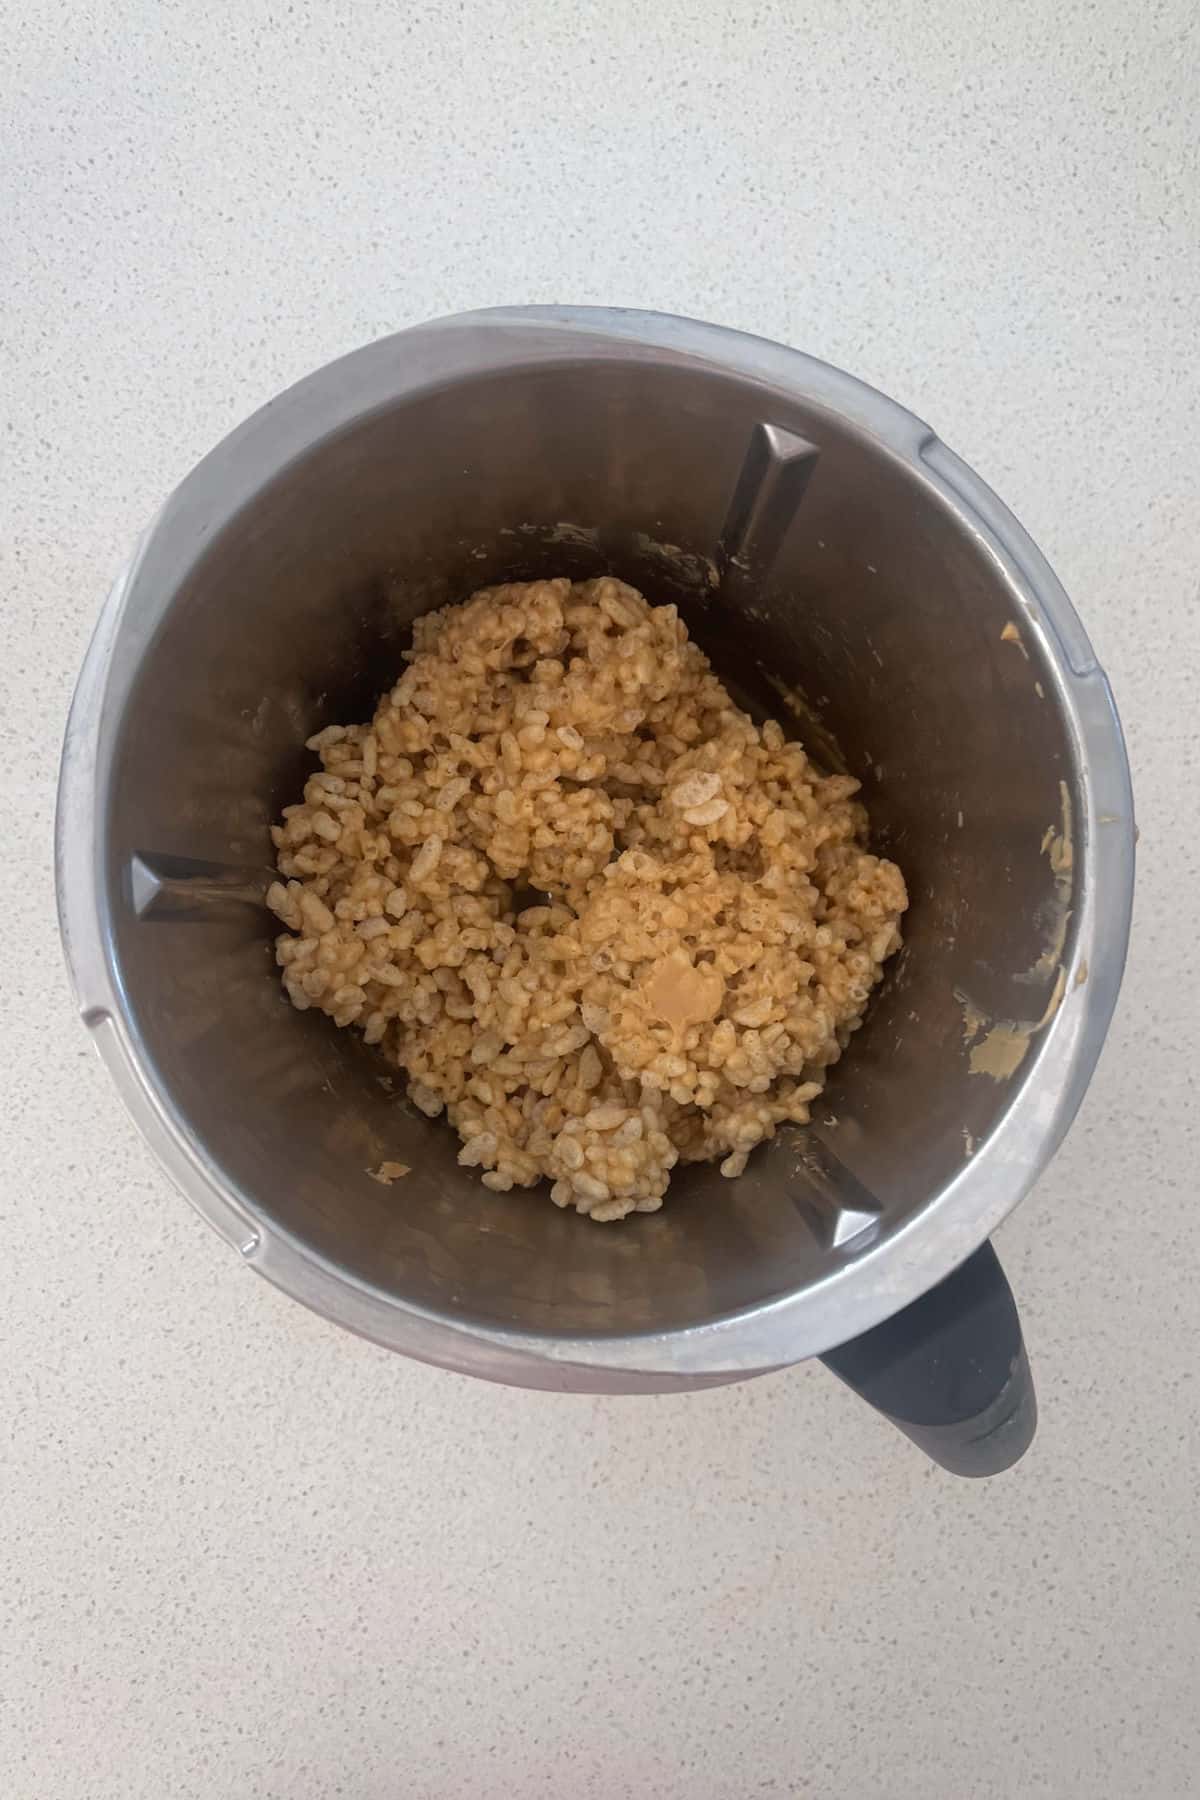
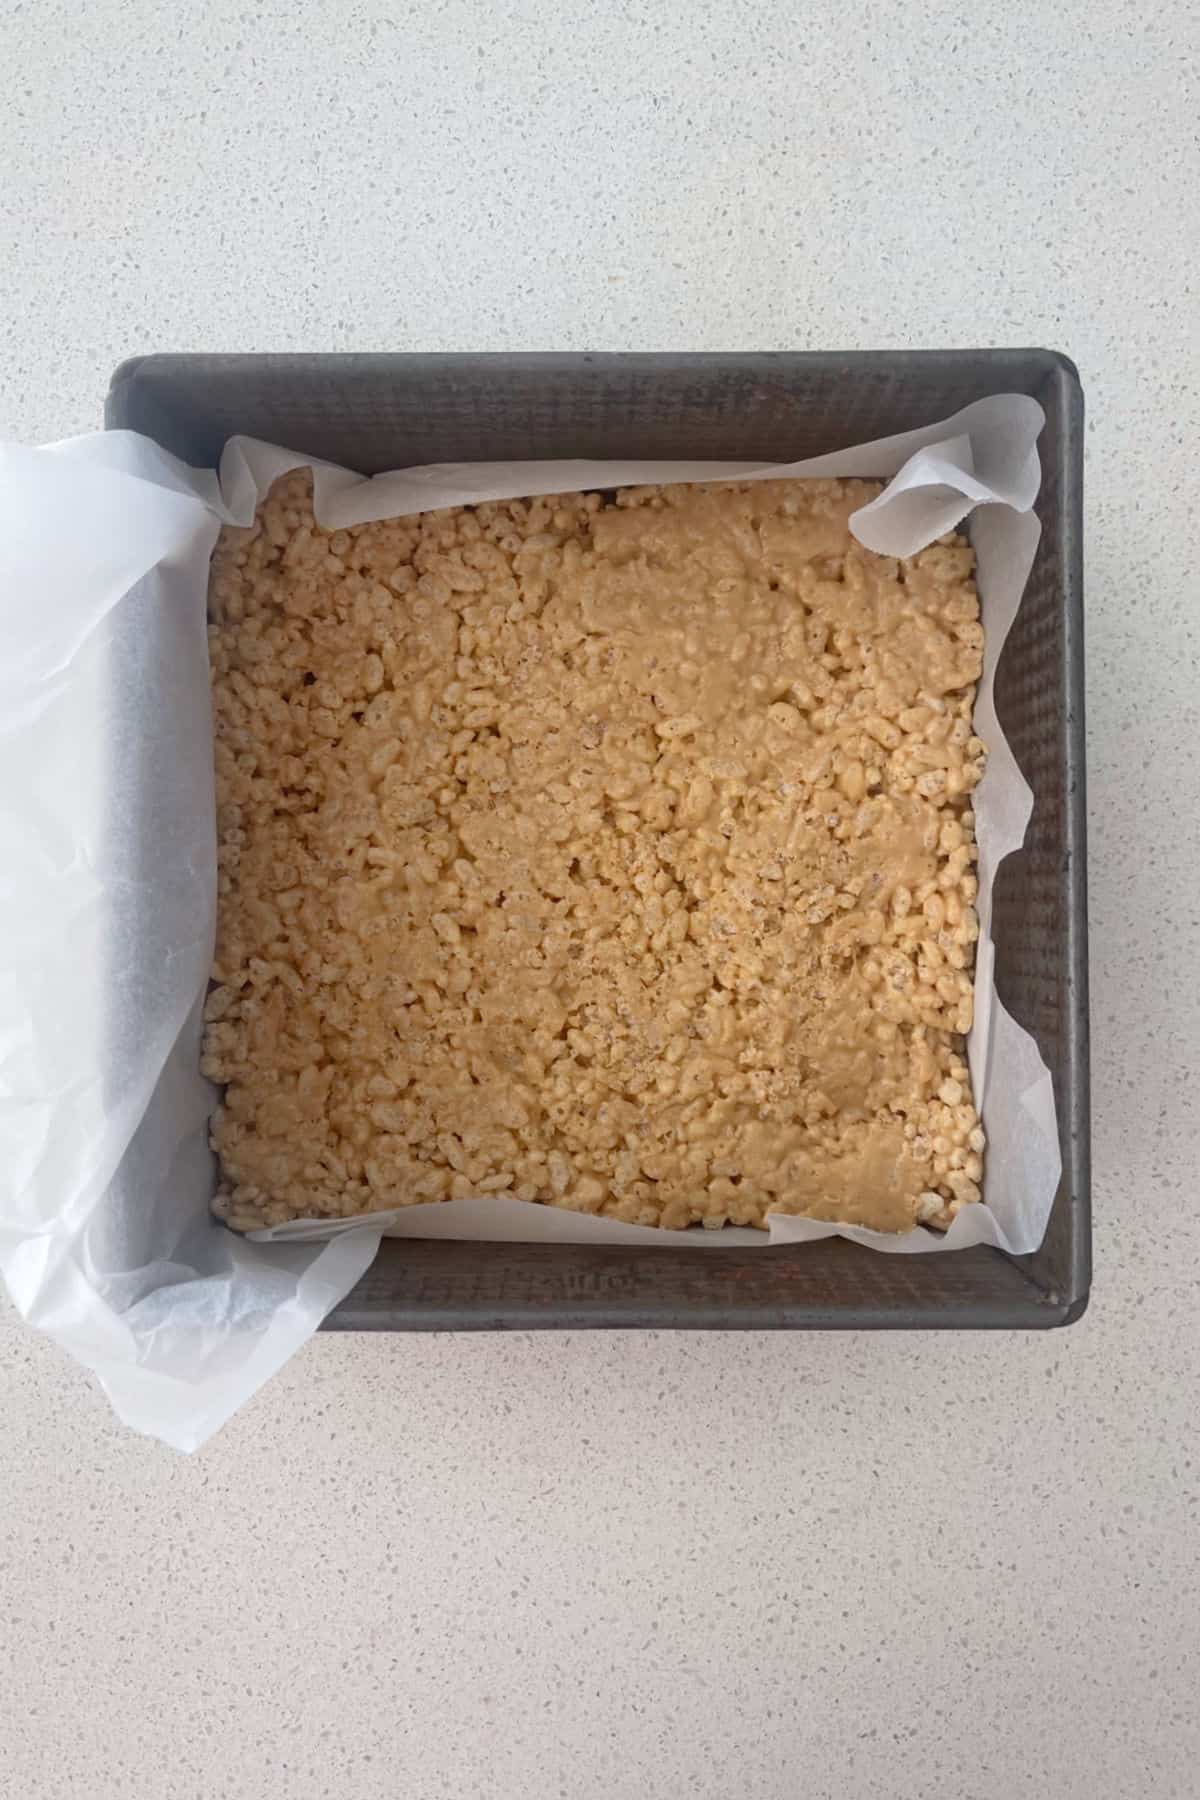
    Step 2. Add the rice bubbles and stir to cover with the peanut butter mixture.

    Step 3. Transfer the mixture to a prepared baking dish lined with baking paper. Gently smooth the surface.

    peanut butter rice bubble slice in a baking dish.

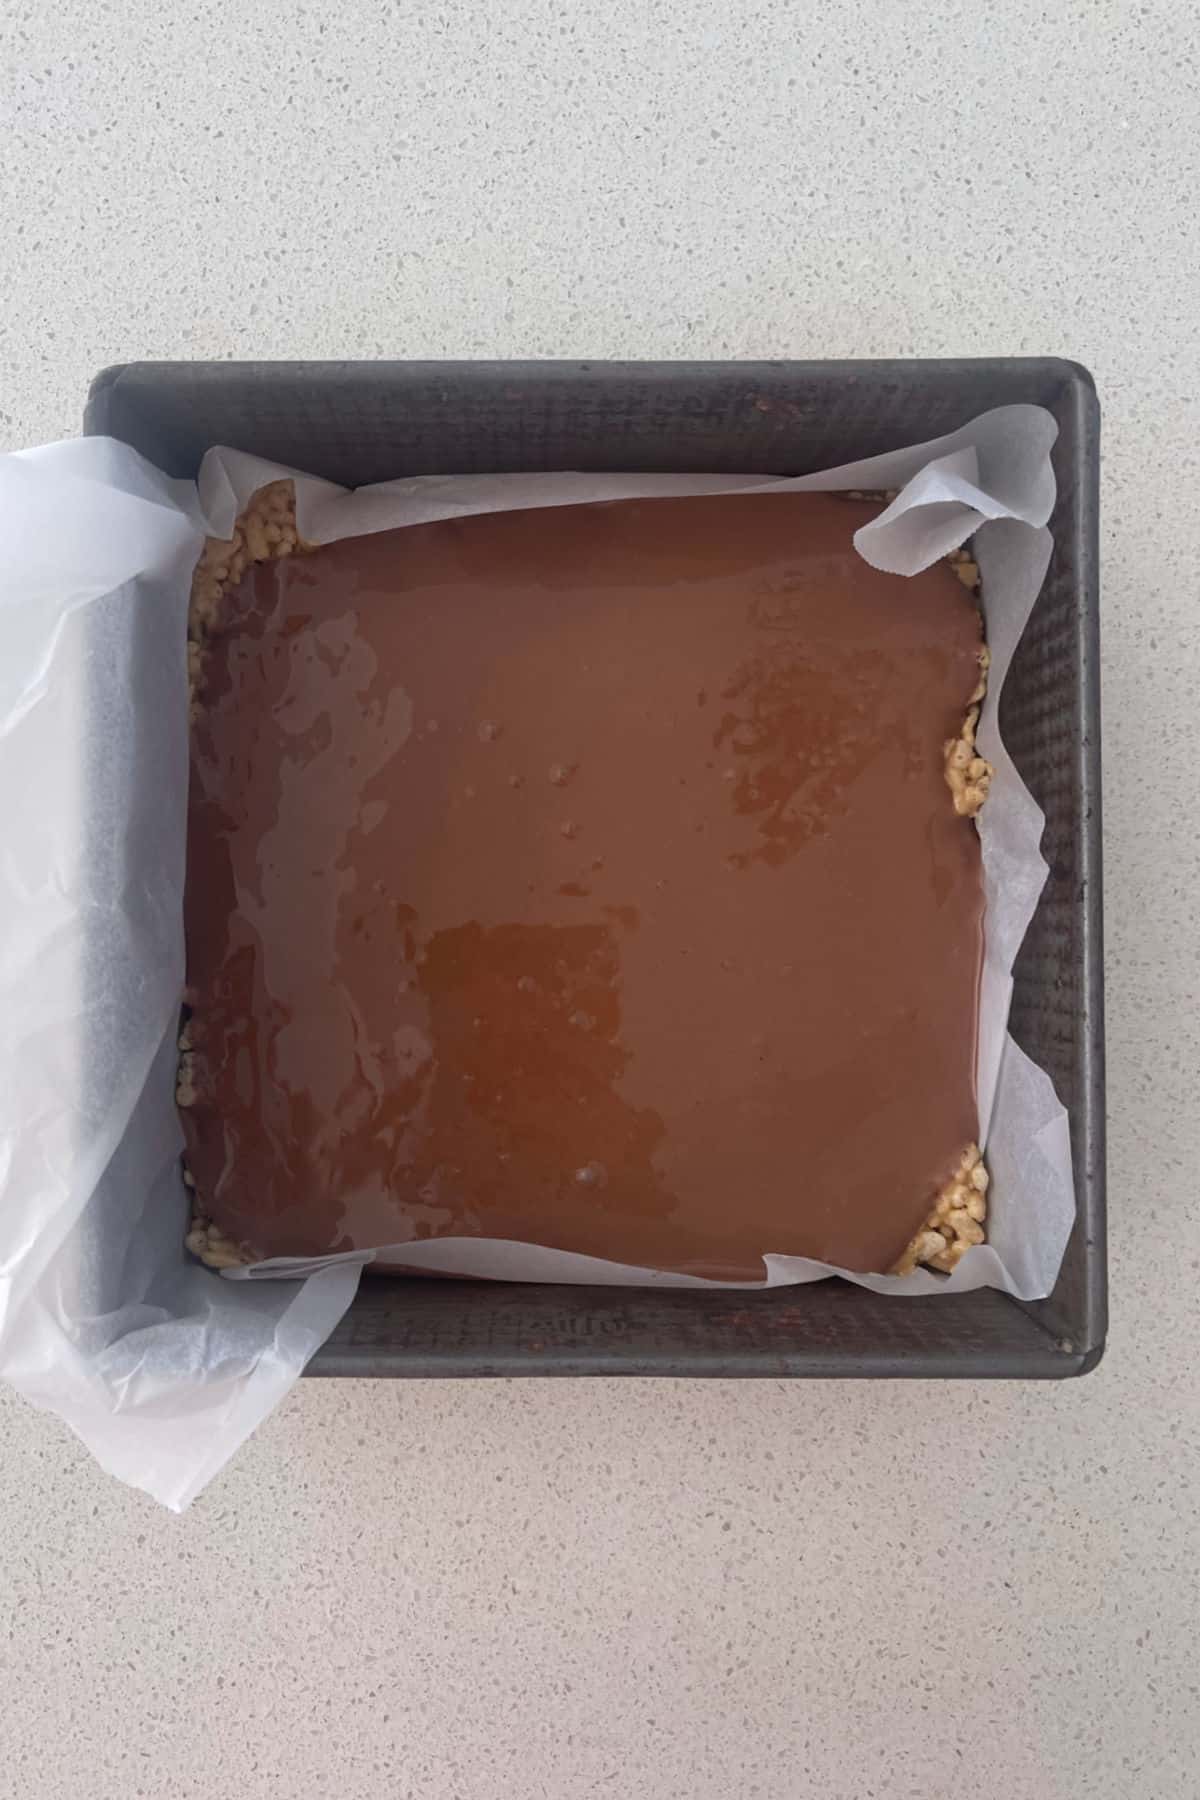
    Step 4. Top the slice with melted chocolate and place into the fridge.

    peanut butter rice bubble slice topped with melted chocolate ready to go into the fridge.

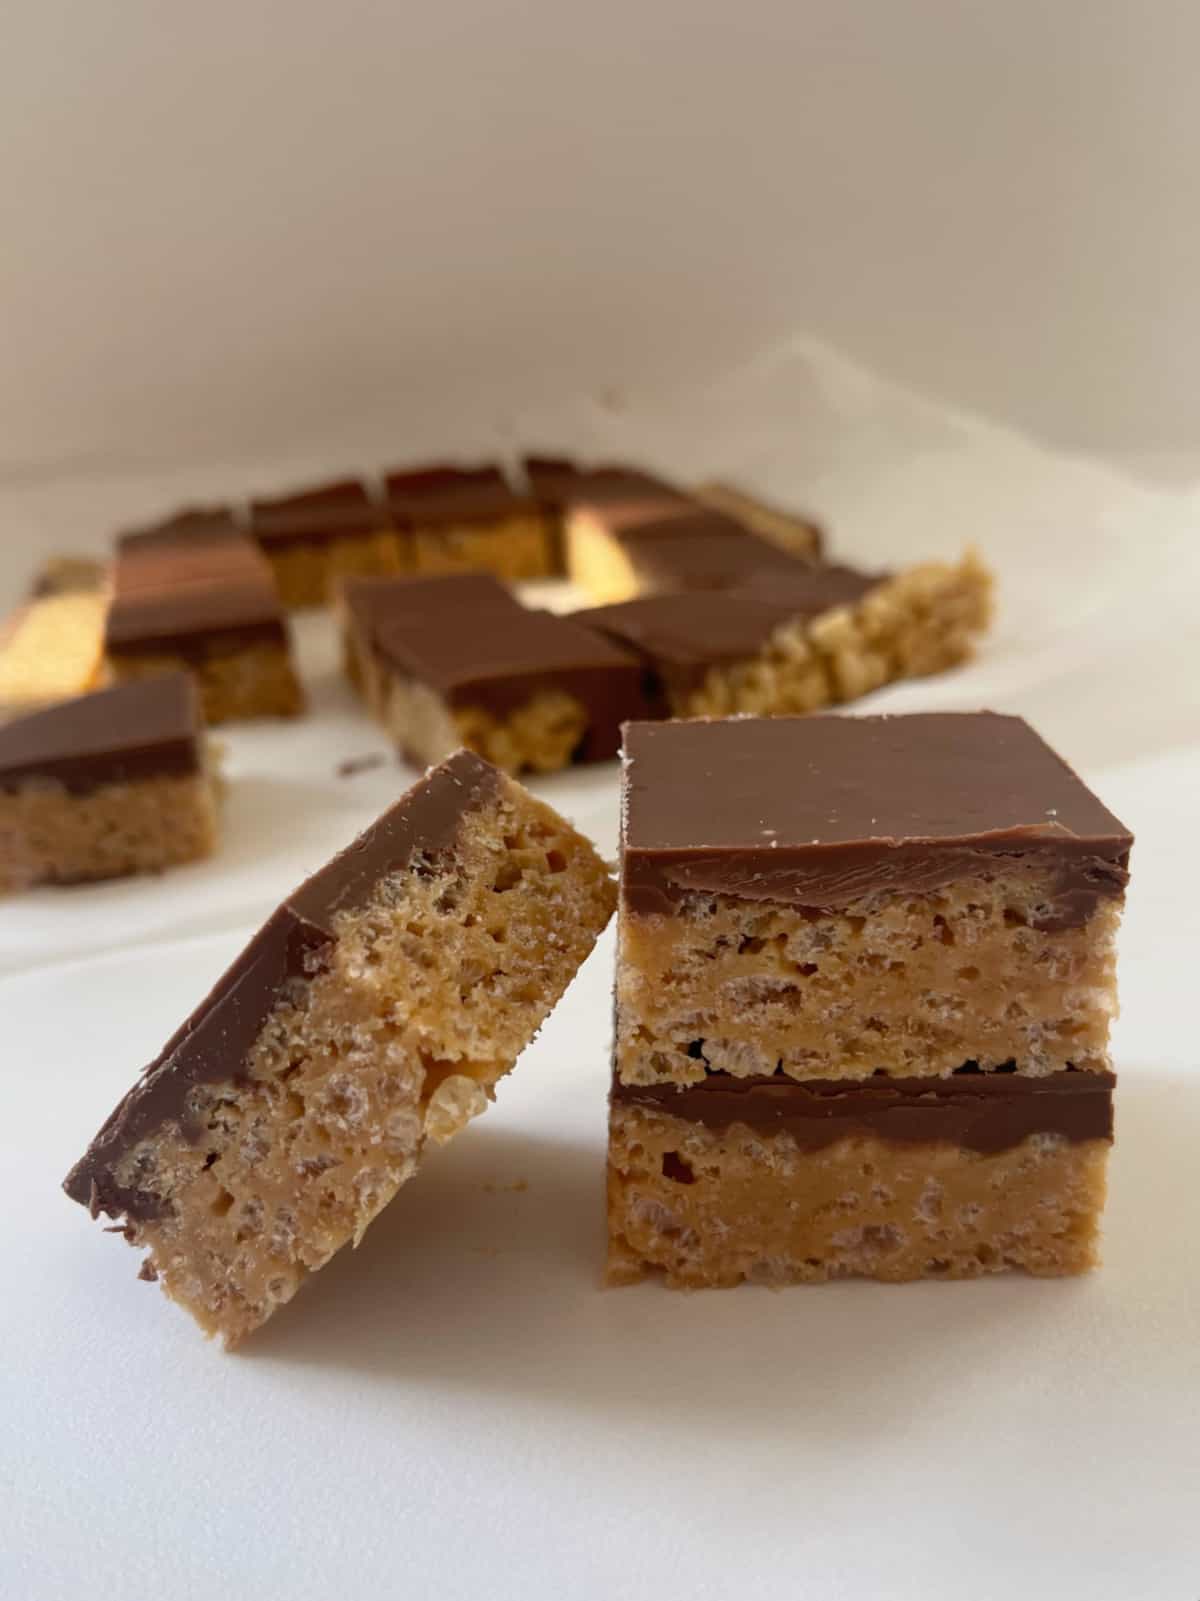
    Step 5. Cut the slice into pieces once set to serve.

    Two pieces of peanut butter rice bubble slice on top of each other. Another piece of slice is leaning against them.

    Recipe Tips and Hints

    I recommend using smooth peanut butter for this recipe.

    The time it takes for the peanut butter and honey to combine will depend on the temperature of both ingredients AND the brand of peanut butter.

    Substitute the honey with rice malt syrup.

    Milk or dark chocolate can be used to top the slice.

    To store, place in an airtight container and store in the fridge for up to one week.

    This slice is NOT freezer friendly.

    FAQ

    What are Rice Bubbles?

    Rice Bubbles are a puffed rice cereal manufactured by Kelloggs.

    Can you buy Rice Krispies in Australia?

    In Australia Rice Krispies are known as Rice Bubbles which can be purchased from all major supermarkets.

    Two pieces of peanut butter rice bubble slice sitting on top of each other on a white backdrop.

    You may also enjoy:

    • Honey Rice Bubble Slice
    • 3 Ingredient Rice Bubble Bars Recipe
    • Homemade Peanut Butter and Honey Muesli Bars
    • Classic Caramel Date Slice Recipe
    • Hedgehog Slice
    • Easy Apricot and White Chocolate Slice
    • Apricot Slice | Classic No Bake Recipe
    • Easy Chocolate Slice
    Two pieces of peanut butter rice bubble slice sitting on top of each other on a white backdrop.

    Peanut Butter Rice Bubble Slice

    Lauren
    This 4 Ingredient Peanut Butter Rice Bubble Slice takes less than 10 minutes to prepare! Both regular and Thermomix instructions included.
    4.50 from 14 votes
    Print Recipe Pin Recipe
    Prep Time 10 minutes mins
    Chilling Time 1 hour hr
    Total Time 1 hour hr 10 minutes mins
    Course Desserts
    Cuisine Modern
    Servings 16
    Calories 157 kcal

    Equipment

    • 1x 20cm square baking dish

    Ingredients
      

    • 3 cups Rice Bubbles 90 grams
    • ½ cup Honey 120 grams
    • 130 grams smooth peanut butter
    • 200 grams milk chocolate

    Instructions
     

    • Line the base and sides of a 20cm square cake tin with baking paper – leaving paper hanging over the edges to help you remove the slice from the tin.
    • Pour the rice bubbles into a large bowl and set aside until needed.
    • Place the honey and peanut butter into a small saucepan. Gently stir the ingredients over a medium heat until they have combined.
    • Remove the saucepan from the heat and quickly pour it into the bowl with the rice bubbles. Use a large metal spoon to carefully combine the ingredients. Make sure that all of the rice bubbles are coated with the peanut butter and rice malt syrup.
    • Once combined, pour the coated rice bubbles into the lined cake tin. Use two metal spoons to cover the base of the tin with the mixture and smooth the surface. Place the tin into the fridge.
    • If you are icing your slice, break the milk chocolate into small pieces and place it along with the vegetable oil into a microwave safe bowl.
    • Cook the chocolate for 30 second spurts until it has almost melted before removing the chocolate from the microwave and stirring until it has completely melted.
    • Remove the slice from the fridge and pour over the melted chocolate – to completely cover the slice you may have to turn the tin to allow the chocolate to run.
    • Place the slice back into the fridge and allow to set – this shouldn’t take much longer than an hour.
    • Once set, remove the slice from the fridge and cut into small squares.

    Thermomix Instructions

    • Line the base and sides of a 20cm square cake tin with baking paper – leaving paper hanging over the edges to help you remove the slice from the tin.
    • Place the honey and peanut butter into the thermomix bowl and cook for 1 minute on 80 degrees, speed 1 or until melted and combined. After approximately 30 seconds, use the spatula to scrape down the sides.
    • Add the rice bubbles to the bowl and mix for 30 seconds on speed 2, Reverse until mixture has combined.
    • Pour the combined mixture into a slice tin and use a metal spoon to spread across the tin and push down.
    • Break the milk chocolate into pieces before placing it along with the oil into a microwave safe bowl. Cook the chocolate for 30 second spurts until it has almost melted, before removing the chocolate from the microwave and stirring until it has completely melted.
    • Pour the melted chocolate over the top of the slice and place in the fridge for an hour or until set.
    • Once set, remove the slice from the fridge and cut into small squares.

    Notes

    I recommend using smooth peanut butter for this recipe.
    The time it takes for the peanut butter and honey to combine will depend on the temperature of both ingredients AND the brand of peanut butter.
    Rice malt syrup can be used in place on honey.
    Either milk or dark chocolate can be used to top the slice.
    To store, place in an airtight container and store in the fridge for up to one week.
    This slice is NOT freezer friendly.

    Nutrition

    Serving: 0gCalories: 157kcalCarbohydrates: 21gProtein: 3gFat: 8gSaturated Fat: 3gPolyunsaturated Fat: 1gMonounsaturated Fat: 3gSodium: 37mgPotassium: 92mgFiber: 1gSugar: 16gVitamin C: 0.1mgCalcium: 8mgIron: 1mg
    Keyword Peanut Butter Rice Bubble Slice, Thermomix Peanut Butter Rice Bubble Slice
    Tried this recipe? Please leave a rating and tag me on Instagram! Mention @createbakemake or tag #createbakemake!

    Looking for even more?

    You can find even more simple and delicious recipes in our books and eBooks – shop the range here.

    thermobliss book set
    « Mars Bar Hot Cross Buns
    Cadbury Creme Egg Cheesecake »

    Filed Under: Slices, Snacks & Treats, Thermomix, Thermomix Desserts, Thermomix Slices

    Reader Interactions

    Comments

    1. Asheley Nisbet

      January 10, 2016 at 2:12 am

      Are the cup measurements actual cups or the US cup measurement? I’m in the uk and need 2 know if I need 2 convert in2 Grams.

      Thanks

      Reply
      • Lauren

        January 10, 2016 at 6:20 am

        Hi, I’m in Australia and use Australian Metric cup sizes. Hope that helps!

        Reply
    « Older Comments
    4.50 from 14 votes (13 ratings without comment)

    Leave a Reply Cancel reply

    Your email address will not be published. Required fields are marked *

    Recipe Rating


    Primary Sidebar

    Lauren placing sprinkles onto cupcakes in her kitchen

    Hi, I'm Lauren! As a Mum of three VERY hungry boys, I know what it’s like to need dinner on the the table FAST. All of my recipes are made using simple ingredients and you will also find both conventional and Thermomix cooking instructions.

    More about me →

    Lunchbox Snacks

    • three pieces of anzac slice stacked on top of each other.
      Anzac Slice

    • Condensed Milk Cookies Stacked in a pile
      Condensed Milk Cookies | Makes 100 Biscuits!

    • stack of banana pikelets on plate
      Easy Banana Pikelets Recipe

    • 3 Ingredient Marshmallow Rice Bubble Slice sitting on a white decorative platter.
      3 Ingredient Rice Bubble Bars Recipe

    Simple Family Dinners

    • spoon holding a baked chicken parma ball.
      Chicken Parma Balls

    • Creamy Chicken Pie cut in half on plate
      Creamy Chicken Pies | Homemade Chicken Pie Recipe

    • Roast Chicken on wooden board
      Air Fryer Roast Chicken | An Easy Family Friendly Dinner

    • Overhead view of two beef rissoles with a side of coleslaw on a grey speckled plate.
      Beef Rissoles

    Thermomix Recipe Books

    ThermoBliss 11 book complete set

    Browse the full range of books and eBooks here.

    Footer

    ↑ back to top

    About

    • About Me
    • Privacy Policy

    Newsletter

    • Sign Up! for emails and updates

    Contact

    • email: hello@createbakemake.com

    Copyright © 2024 Create Bake Make

    Please note that the content including images and recipes contained within the Create Bake Make website and recipe books are protected by copyright 2024. Adding and/or sharing of content from the Create Bake Make website or recipe books to third party websites or platforms is prohibited.

    Foodie Pro on the Foodie Pro Theme

    Rate This Recipe

    Your vote:


    A rating is required
    A name is required
    An email is required

    Recipe Ratings without Comment

    Something went wrong. Please try again.