• Skip to primary navigation
  • Skip to main content
  • Skip to primary sidebar
Create Bake Make
  • Home
  • Recipes
    • Biscuits and Cookies
    • Cakes and Muffins
    • Lunchbox Ideas
    • Slices
    • Dinners
    • Desserts
    • Snacks & Treats
    • Cheesecake
    • Breakfast
    • Party Food
    • Easter
    • Christmas
  • Thermomix
    • Thermomix Biscuits
    • Thermomix Cakes and Muffins
    • Thermomix Dinners
    • Thermomix Desserts
    • Thermomix Lunch Box Snacks
    • Thermomix Slices
    • Thermomix Easter Recipes
    • Thermomix Christmas Recipes
  • Food for Kids
  • SHOP
  • About
    • Facebook
    • Instagram
    • Pinterest
    • RSS
    • Twitter
menu icon
go to homepage
  • Lunchbox Ideas
  • Dinners
  • Thermomix Recipes
  • Sweet
  • All Recipes
  • Shop
    • Facebook
    • Instagram
    • Pinterest
  • subscribe
    search icon
    Homepage link
    • Lunchbox Ideas
    • Dinners
    • Thermomix Recipes
    • Sweet
    • All Recipes
    • Shop
    • Facebook
    • Instagram
    • Pinterest
  • ×
    • Two Chocolate Snickers Brownies sitting on top of each other.
      Snickers Chocolate Brownies
    • Biscoff Cheesecake
    • Overhead view of corn relish dip in a blue bowl surrounded by crackers.
      Corn Relish Dip
    • Cheese Sauce dripping from a silver spoon into a bowl.
      Thermomix Cheese Sauce
    • Slice of Focaccia on a white bench. In the background are more slices of Focaccia.
      Thermomix Focaccia
    • Two slices of biscoff brownies on top of each other. in the background in a jar of biscoff.
      Biscoff Brownies
    • Side view of Thermomix zucchini slice on a green plate
      Thermomix Zucchini Slice
    • Close up of Curried Eggs topped with chives on a blue plate.
      Curried Eggs
    • Two Margaritas made using a thermomix in glasses garnished with salt and lime.
      Thermomix Margaritas
    • Side view of Cranberry and Brie Puff Pastry Star with a piece of brie removed
      Cranberry and Brie Puff Pastry Star
    • Close up of a piece of Biscoff Fudge on a sheet of baking paper. In the background is more fudge and jar of Biscoff spread.
      Biscoff Fudge
    • Slice of Vanilla Sheet Cake sitting in front of a wire rack.
      Vanilla Sheet Cake
    Create Bake Make / Food for Kids / Baked Chicken Zucchini and Cheese Balls

    Baked Chicken Zucchini and Cheese Balls

    Published: Jul 9, 2018 · Modified: Feb 13, 2022 by Lauren Matheson ·

    118348 shares
    • Share
    • Tweet
    Jump to Recipe Print Recipe

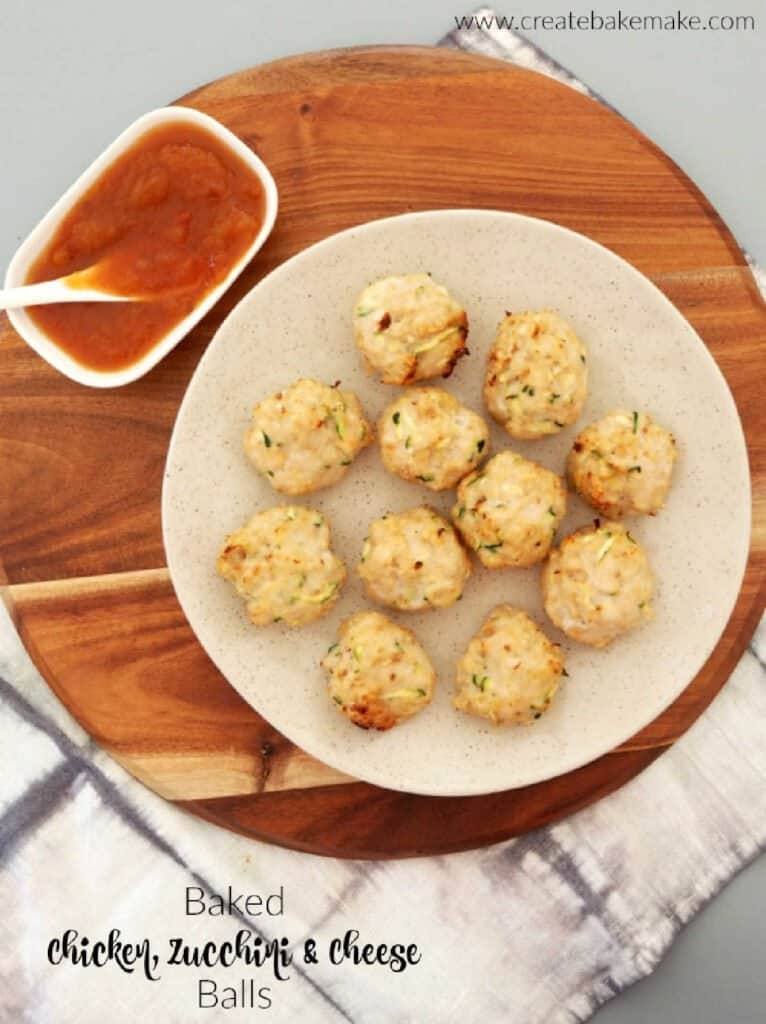
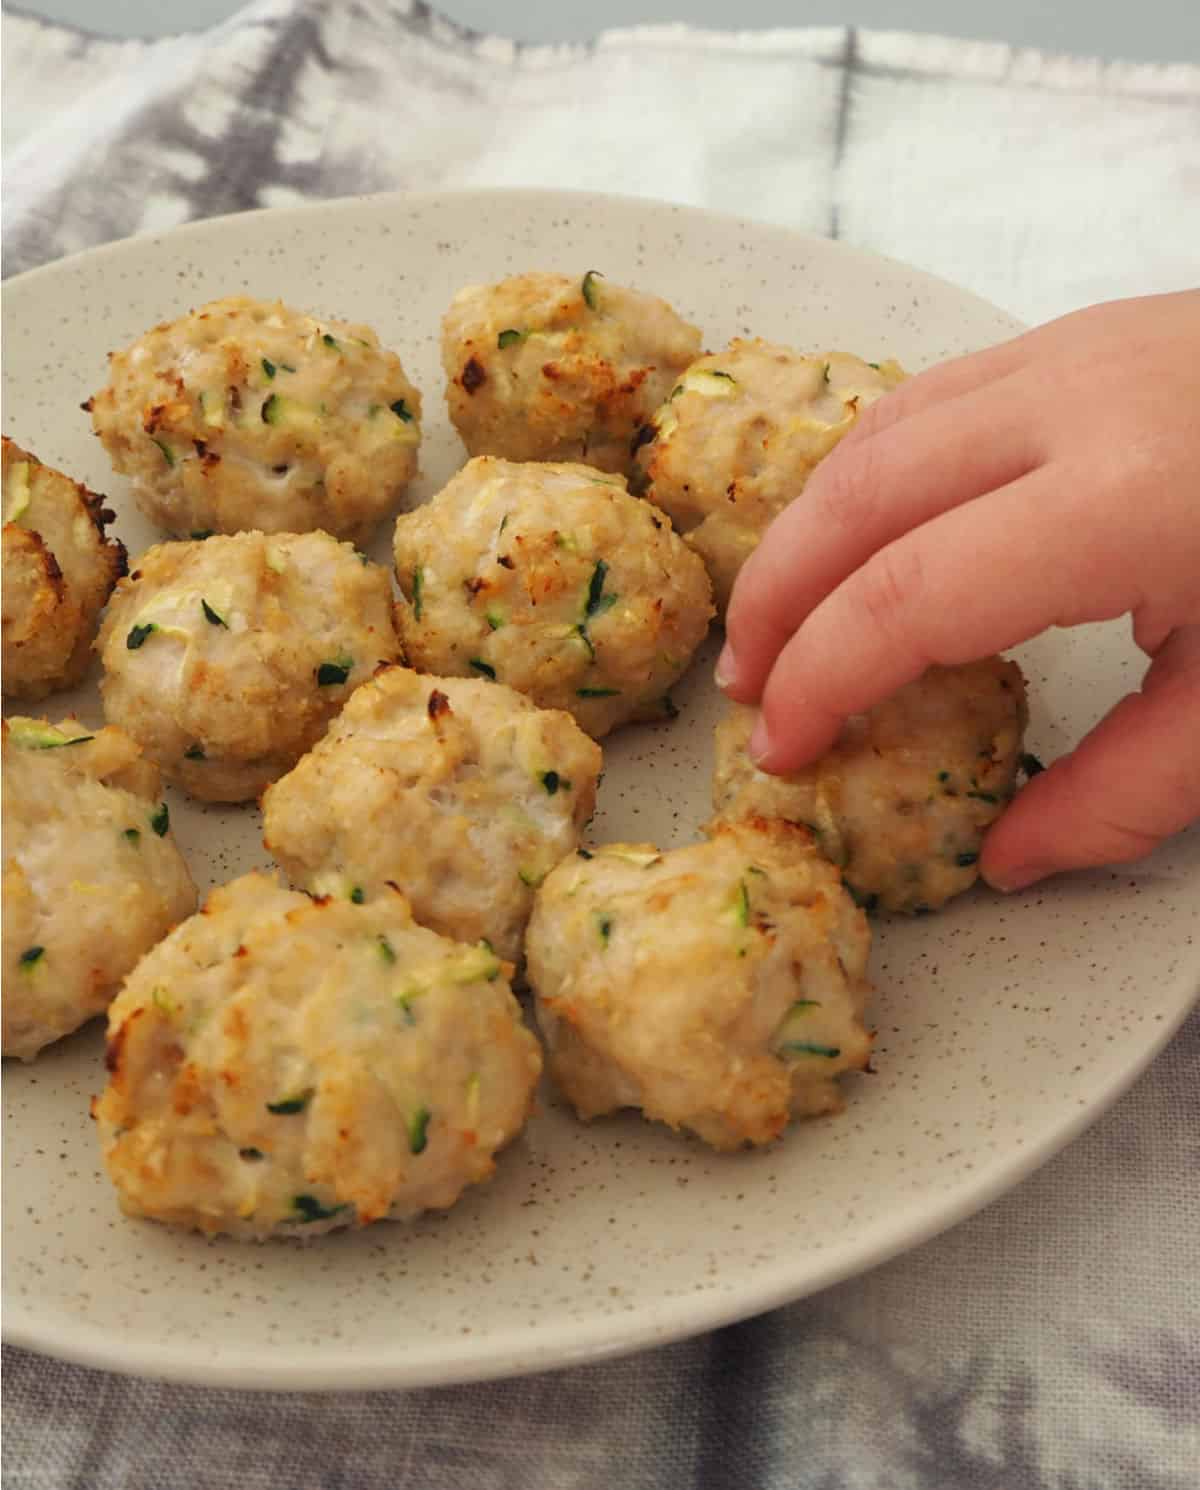
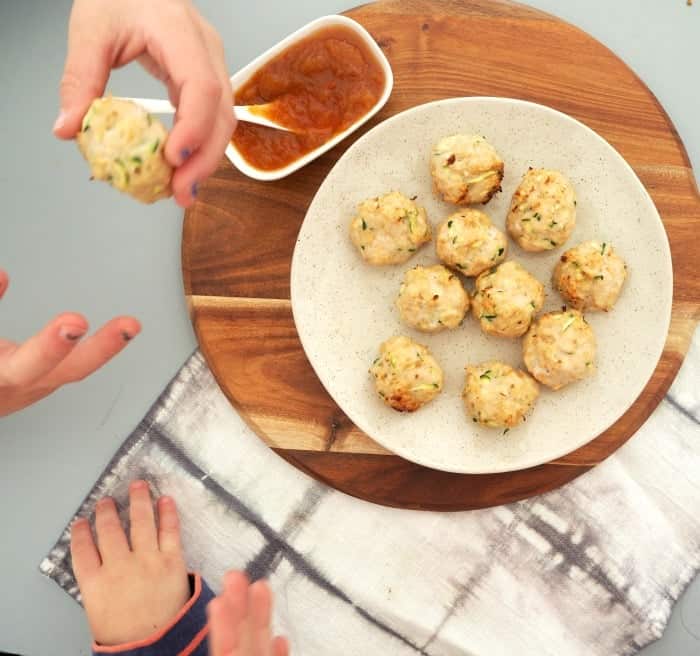
    These Baked Chicken Zucchini and Cheese Balls make a great snack or easy meal and they also couldn’t be easier to make! It takes less than 40 minutes to make and bake these Chicken Zucchini and Cheese Balls and they can also be frozen to enjoy as an easy meal another time. You can serve these delicious little morsels on their own or they are also yummy served with tomato chutney or sweet chilli sauce.

    We’ve been eating quite a few of my Zucchini and Cheese Fritters lately (yep I got a whole bunch of zucchini cheaply!) so these balls were a welcome change!!

    Why you will love this recipe:

    • Family Friendly – these Chicken Zucchini and Cheese Balls are perfect for the whole family and make a great snack, easy meal or addition to the kids lunchbox.
    • Quick to Make – you can be enjoying this recipe in less than 45 minutes!
    • Versatile – easy to adapt to suit your families tastes and preferences.
    • Double it – feeding a crowd? You can double this recipe.
    child's hand reaching for chicken zucchini and cheese ball on a white plate.

    Ingredients:

    Please note you will find the full ingredient list and recipe method in the recipe card below.

    • Chicken – you can use either pre-made chicken mince or mince your own chicken for this recipe.
    • Breadcrumbs.
    • Zucchini – you will need one small zucchini for this recipe.
    • Parmesan Cheese
    • Garlic – either crushed garlic or minced garlic can be used for this recipe.
    • Onion Flakes – you can also use onion powder if you prefer.
    • Tomato Relish – this can be substituted with tomato sauce or chutney.
    Close up side view of Baked Chicken Zucchini and Cheese Balls on a speckled plate.

    How to Make Baked Chicken Zucchini and Cheese Balls:

    1. Preheat your oven.
    2. Combine all of the ingredients in a large bowl and mix well.
    3. Scoop up the mixture and roll into balls.
    4. Place the balls onto a baking tray and bake until golden.
    Baked Chicken Zucchini and Cheese Balls

    Tips for Making these Baked Chicken Zucchini and Cheese Balls Recipe:

    • You can use either pre-made chicken mince or mince your own.
    • This recipe can be doubled if feeding a crowd. If making in a Thermomix, ensure you do not exceed the maximum fill limits of your appliance.
    • You can make your balls larger or smaller, however please note the cooking time will vary.
    • The water content of zucchinis and pre-made chicken mince can vary, if you find your mixture is too wet, add some more breadcrumbs.
    • Store in the fridge and enjoy within four days.
    • You can freeze any leftovers in a freezer safe container for up to two months.

    More Family Friendly Recipes:

    • Healthy Sausage Rolls
    • Pizza Pinwheels
    • Homemade Beef and Vegetable Pasties
    • Baked Sweet Chilli Chicken Balls
    • Ham, Corn and Cheese Impossible Pie
    • Easy Quiche Lorraine Recipe
    • Chicken and Vegetable Parma Balls
    • Spaghetti and Cheats Meatballs
    • Chicken Sausage Rolls
    • The Best Slow Cooked Beef Recipe
    Close up side view of Baked Chicken Zucchini and Cheese Balls on a speckled plate.

    Baked Chicken Zucchini and Cheese Balls

    These Baked Chicken Zucchini and Cheese Balls make a great snack or easy meal for the whole family! They are freezer friendly and you can also enjoy them both hot or cold – perfect for lunch boxes! Both regular and Thermomix instructions included.
    4.30 from 58 votes
    Print Recipe Pin Recipe
    Prep Time 15 minutes mins
    Cook Time 20 minutes mins
    Total Time 35 minutes mins
    Course Dinner, Snacks
    Cuisine Australian
    Servings 24 Balls
    Calories 49 kcal

    Equipment

    • Baking Tray

    Ingredients
      

    • 500 grams chicken mince
    • ½ cup breadcrumbs approximately 2 slices of bread
    • ½ cup grated zucchini 60 grams
    • ½ cup grated parmesan cheese 50 grams
    • 2 cloves garlic crushed
    • ½ tablespoon onion flakes
    • 1 tablespoon tomato relish
    • Pinch of salt and pepper

    Instructions
     

    • Preheat your oven to 220 degrees celsius (fan-forced) and lightly grease a non stick baking tray.
    • Place all of the ingredients into a large bowl and mix well to combine.
    • Use a tablespoon to scoop up the chicken mixture and shape into balls. If you find the mixture is still a little ‘wet’ you can add some more breadcrumbs to help it ‘stick’ together and shape into balls.
    • Place the chicken balls onto your prepared baking tray and cook for 16 – 18 minutes or until they begin to turn golden and are cooked through when tested.

    Thermomix Instructions

    • Preheat your oven to 220 degrees celsius (fan-forced) and lightly grease a non stick baking tray.
    • Place the stale bread and parmesan cheese (which has been cut into 3cm chunks) into your Thermomix bowl and mix for 8 seconds, speed 8 to grate. Set aside until needed.
    • Without washing the bowl, add the zucchini and mix for 5 seconds, speed 4 to grate.
    • Add the cheese and breadcrumbs along with all other remaining ingredients to your Thermomix bowl and mix for 10 seconds, speed 4 to combine.
    • Scrape down the sides of your Thermomix bowl and mix for a further 10 seconds on speed 4 to combine.
    • Use a tablespoon to scoop up the chicken mixture and shape into balls. If you find the mixture is still a little ‘wet’ you can add some more breadcrumbs to help it ‘stick’ together and shape into balls.
    • Place the chicken balls onto your prepared baking tray and cook for 16 – 18 minutes or until they begin to turn golden and are cooked through when tested.

    Notes

    • You can use either pre-made chicken mince or mince your own.
    • This recipe can be doubled if feeding a crowd. If making in a Thermomix, ensure you do not exceed the maximum fill limits of your appliance.
    • You can make your balls larger or smaller, however please note the cooking time will vary.
    • The water content of zucchinis and pre-made chicken mince can vary, if you find your mixture is too wet, add some more breadcrumbs.
    • These Chicken Zucchini and Cheese Balls are best stored in the fridge and enjoyed within four days of making.
    • You can freeze any leftovers in a freezer safe container for up to two months.

    Nutrition

    Serving: 0gCalories: 49kcalCarbohydrates: 2gProtein: 5gFat: 2gSaturated Fat: 1gPolyunsaturated Fat: 1gMonounsaturated Fat: 1gTrans Fat: 1gCholesterol: 20mgSodium: 64mgPotassium: 127mgFiber: 1gSugar: 1gVitamin A: 26IUVitamin C: 1mgCalcium: 30mgIron: 1mg
    Keyword Chicken Recipes, Party Food, Thermomix
    Tried this recipe? Please leave a rating and tag me on Instagram! Mention @createbakemake or tag #createbakemake!

    Looking for more?

    You can find more easy and family friendly recipes in our books and eBooks – browse the full collection here.

    ThermoBliss 11 book complete set
    « Broccoli Bacon and Cheese Fritters
    Chocolate Chip Anzac Slice Recipe »

    Filed Under: Dinners, Food for Kids, Lunchbox Ideas, Party Food, Savoury, Snacks & Treats, Thermomix, Thermomix Dinners, Thermomix Lunch Box Snacks

    Reader Interactions

    Comments

    1. JEANNE FERRER

      September 02, 2021 at 8:16 am

      Hi Lauren, thank you for a great recipe. May I ask how old your littlest one was when you first served these? Mine is a 20-month old fussy eater!! Thank you 🙂

      Reply
    2. Tash

      March 18, 2021 at 10:42 pm

      5 stars
      I made these for the first time this week and they were enjoyed by everyone. They were perfect to add some bulk to the rest of the meal as well as in lunchboxes the next day 🙂

      I took a shortcut with the rolling part and used a small cookie scoop so I didn’t have to roll them by hand – i highly recommend doing this if you have one of these!

      Reply
    3. Nannette Rudy

      July 06, 2020 at 5:44 am

      Do you use cooked meat are raw meat oh, I would like to use ground pork with pork rinds crown and how much is 500 grams abate English please well not metric I mean

      Reply
      • Lauren Matheson

        July 26, 2020 at 5:37 pm

        Hi Nannette, I use raw mince for this recipe.

        Reply
    4. Rachael

      February 04, 2020 at 10:32 am

      If using breadcrumbs (instead of stale bread to make the breadcrumbs) how many grams of breadcrumbs would you recommend?

      Reply
      • Lauren Matheson

        February 07, 2020 at 3:01 pm

        I’d start with 50 grams 🙂

        Reply
    5. Kristy

      January 02, 2020 at 5:28 pm

      Squeezing the moisture out of the zucchini after you grate it (I use a clean tea towel) stops them being too wet, and rolling them in sesame seeds makes for a nice variation for mum & dad and kids if they’re not too fussy

      Reply
      • Lauren Matheson

        January 05, 2020 at 8:25 am

        Thanks for the tips Kristy xx

        Reply
    6. Nikki

      July 20, 2019 at 3:19 pm

      5 stars
      I used ground pork rind instead of bread crumbs to make it Keto friendly. Omg! The best!

      Reply
      • Lauren Matheson

        July 22, 2019 at 5:26 am

        What a great idea!!

        Reply
      • Corinne Young

        August 06, 2019 at 4:58 pm

        Would these be gluten abd lactose free. They look nice to eat and easy to make.Corinne

        Reply
        • Lauren Matheson

          August 09, 2019 at 6:03 am

          Hi Corinne, Depending on the brands of ingredients you use I think they would be x

    7. Katie

      June 03, 2019 at 3:09 pm

      would these work with Pork Mince Instead ?

      Reply
      • Lauren Matheson

        June 06, 2019 at 6:22 am

        I don’t see why not! I’d love to hear how it goes 🙂

        Reply
        • Courtney

          October 28, 2019 at 2:15 pm

          I made them with Turkey mince

    8. Jean

      February 17, 2019 at 6:57 pm

      Hi ,

      Can I check if we can have it frozen after it is cooked or after we shape them into balls?

      Reply
      • Sarah

        February 18, 2019 at 9:44 am

        I would cook and freeze, then simply heat and serve when required

        Reply
    4.30 from 58 votes (56 ratings without comment)

    Leave a Reply Cancel reply

    Your email address will not be published. Required fields are marked *

    Recipe Rating


    Primary Sidebar

    Lauren placing sprinkles onto cupcakes in her kitchen

    Hi, I'm Lauren! As a Mum of three VERY hungry boys, I know what it’s like to need dinner on the the table FAST. All of my recipes are made using simple ingredients and you will also find both conventional and Thermomix cooking instructions.

    More about me →

    Lunchbox Snacks

    • three pieces of anzac slice stacked on top of each other.
      Anzac Slice

    • Condensed Milk Cookies Stacked in a pile
      Condensed Milk Cookies | Makes 100 Biscuits!

    • stack of banana pikelets on plate
      Easy Banana Pikelets Recipe

    • 3 Ingredient Marshmallow Rice Bubble Slice sitting on a white decorative platter.
      3 Ingredient Rice Bubble Bars Recipe

    Simple Family Dinners

    • spoon holding a baked chicken parma ball.
      Chicken Parma Balls

    • Creamy Chicken Pie cut in half on plate
      Creamy Chicken Pies | Homemade Chicken Pie Recipe

    • Roast Chicken on wooden board
      Air Fryer Roast Chicken | An Easy Family Friendly Dinner

    • Overhead view of two beef rissoles with a side of coleslaw on a grey speckled plate.
      Beef Rissoles

    Thermomix Recipe Books

    ThermoBliss 11 book complete set

    Browse the full range of books and eBooks here.

    Footer

    ↑ back to top

    About

    • About Me
    • Privacy Policy

    Newsletter

    • Sign Up! for emails and updates

    Contact

    • email: hello@createbakemake.com

    Copyright © 2024 Create Bake Make

    Please note that the content including images and recipes contained within the Create Bake Make website and recipe books are protected by copyright 2024. Adding and/or sharing of content from the Create Bake Make website or recipe books to third party websites or platforms is prohibited.

    Foodie Pro on the Foodie Pro Theme

    Rate This Recipe

    Your vote:


    A rating is required
    A name is required
    An email is required

    Recipe Ratings without Comment

    Something went wrong. Please try again.