This easy Marble Cake recipe is a classic! It is made with simple pantry staples, can be ready in less than one hour and both regular and Thermomix methods are included.
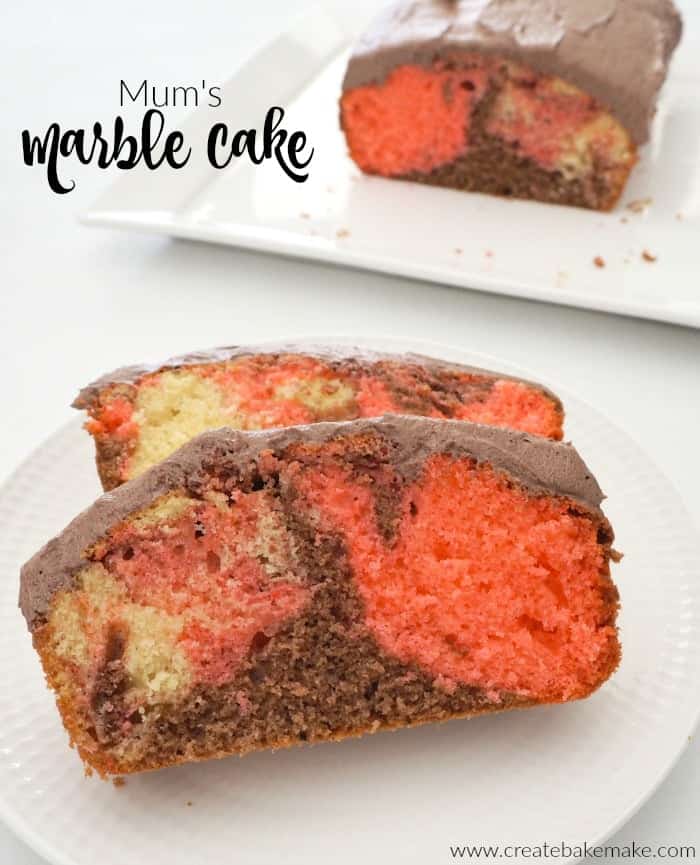
My Mum used to make this Marble Cake for my sister and I as a special treat, and I just love that I use the same recipe now to make it for my kids. It is based on our favourite butter cake recipe and combines the classic ‘flavours’ of vanilla, chocolate and strawberry.
Why we love this recipe:
- Made with pantry staples – you most likely have everything you need to make this cake in your pantry and fridge! If you don’t happen to have pink food colouring, you can use another colour or you can simply divide the mixture into two and have a chocolate and vanilla marble cake.
- Freezer friendly – freeze this cake for up to two months either iced or plain. To thaw, place in the fridge or benchtop.
- Perfect for celebrations – although simple to make, this cake is sure to impress friends and family at your next special event.
Ingredients
Please note you will find the full ingredient list and both regular and Thermomix methods in the recipe card below.
- Self-raising flour
- Butter – I use unsalted butter for this recipe.
- Milk – I use reduced fat milk, however full cream can also be used.
- Eggs – 70gram eggs are used in all recipes unless otherwise stated.
- Caster Sugar – also know as superfine sugar.
- Vanilla Extract – can substitute with vanilla esence.
- Cocoa
- Pink Food Colouring – see notes.
How to Make a Marble Cake
- Line the based on a cake tin and lightly grease the sides. Set aside until needed.
- Cream the butter and sugar until pale and creamy. You can use either a handheld mixer or Thermomix to do this.
3. Add the remaining ingredients and mix until just combined.
4. Evenly divide the cake batter between three bowls.
5. Add Cocoa to one bowl and 2 – 3 drops of food pink food colouring to another. Mix to combine. Leave the third bowl plain.
6. Use a spoon to dollop the mixture into the prepared cake tin and then gently swirl the mixture together using a butter knife
7. Bake until golden and cooked through when tested with a skewer.
To Serve
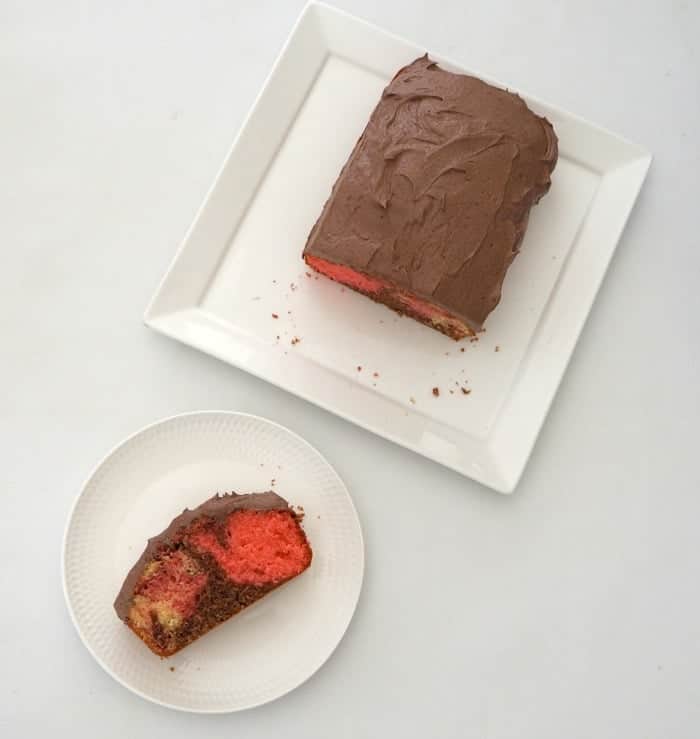
You can top this Marble Cake with whatever icing you like, I decided to keep it really simple and used my Chocolate Icing recipe, however in the past I’ve also used store bought chocolate fudge icing, which between us, tasted amazing! This recipe makes one round cake, however you can also bake it in a loaf or square tin, you will just need to adjust the cooking time accordingly.
Tips for Best Results
- You will need to use softened butter for this recipe. If the butter is firm, it will take longer to incorporate the ingredients.
- Substitute the pink food colouring for different colours if preferred/don’t have it. Alternatively, divide the batter in two for a chocolate and vanilla marble cake.
- A butter knife is my suggested tool to create the swirl.
- Alternative baking tins can be used (eg muffin tray, 20cm round tin or bar tins) however please note the baking times will vary
- Place in an airtight container and store in a cool place. This cake is best enjoyed within one week. Alternative if you are freezing this cake, wrap in foil or place in a freezer safe container before storing for up to two months
- I usually ice this Thermomix Marble Cake with a simple chocolate icing however you can also top it with a store bought chocolate or vanilla icing, and it’s even delicious served un-iced.
You may also enjoy these recipes:
- Lemon Yoghurt Cake
- Vanilla Butter Cake | Classic Plain Cake Recipe
- Simple Chocolate Cake Recipe | Nan’s Recipe
- Orange Cake
- Easy Caramel Mud Cake Recipe
- One Bowl Lemon Cake
- Fluffy Banana Cake with Cream Cheese Frosting
- Recipe for Sponge Cake | With Jam and Cream
- Lemon and Poppy Seed Cake
Marble Cake
Equipment
- 1 x Loaf Tin see notes
Ingredients
- 1 ½ cups self raising flour 200 grams
- 110 grams butter at room temperature
- ½ cup caster sugar 110 grams
- 1 teaspoon vanilla extract
- 2 eggs 70 gram eggs
- 4 tablespoons milk 80 grams
- 1 teaspoon cocoa
- pink food colouring
Instructions
- Preheat your oven to 180 degrees celsius (fan-forced) and line the base of a loaf tin with baking paper before lightly greasing the sides.
- Place the butter and caster sugar into the bowl of an electric mixer (or use handheld beaters) and beat for 3 – 4 minutes or until pale and creamy.
- Add the vanilla extract and milk and mix to combine.
- With the mixer running on a slow speed, add the eggs one at time and beat well.
- Add the self raising flour and mix until just combined.
- Transfer the mixture in three equal parts and add the cocoa to one and a couple of drops of pink food colouring to the other. Mix to create the coloured mixture.
- Add spoonfuls of the three different coloured mixtures to your prepared loaf tin and once all the mixture is in the tin, use a butter knife to gently swirl the mixture to create the ‘marble’ effect.
- Place the cake tin into the oven and cook for 30 – 35 minutes or until your marble cake is cooked through when tested with a skewer.
Thermomix Instructions
- Preheat your oven to 180 degrees celsius (fan-forced) and line a 20cm round cake tin with baking paper.
- Place the butter (softened) and caster sugar into your Thermomix bowl and mix for 30 seconds on speed 3.
- Scrape down the sides of the bowl and mix for a further 20 seconds, speed 3.
- Add the vanilla extract, milk, eggs and self raising flour and mix for 10 seconds, speed 4. Scrape down the sides of the bowl and mix for a further 5 seconds, speed 4 or until well combined.
- Follow instructions from step 6.
Notes
- You will need to use softened butter for this recipe. If the butter is firm, it will take longer to incorporate the ingredients.
- Substitute the pink food colouring for different colours if preferred/don’t have it. Alternatively, divide the batter in two for a chocolate and vanilla marble cake.
- A butter knife is my suggested tool to create the swirl.
- Alternative baking tins can be used (eg muffin tray, 20cm round tin or bar tins) however please note the baking times will vary
- Place in an airtight container and store in a cool place. This cake is best enjoyed within one week. Alternative if you are freezing this cake, wrap in foil or place in a freezer safe container before storing for up to two months
- I usually ice this Thermomix Marble Cake with a simple chocolate icing however you can also top it with a store bought chocolate or vanilla icing, and it’s even delicious served un-iced.
Nutrition
Thermomix Marble Cake Instructions
- Preheat your oven to 180 degrees celsius (fan-forced) and line a large loaf tin with baking paper.
- Place the butter and caster sugar into your Thermomix bowl and mix for 30 seconds, speed 3.
- Scrape down the sides of the bowl and mix for a further 20 seconds, speed 3.
- Add the vanilla extract, milk, eggs and self raising flour and mix for 10 seconds, speed 4.
- Scrape down the sides of the bowl and mix for a further 5 seconds, speed 4 or until well combined.
- Transfer the mixture in three equal parts and add the cocoa to one and a couple of drops of pink food colouring (or cochineal if using) to the other. Mix to create the coloured mixture.
- Add spoonfuls of the three different coloured mixtures to your prepared loaf tin and once all the mixture is in the tin, use a butter knife to gently swirl the mixture to create the ‘marble’ effect.
- Place the cake tin into the oven and cook for 30 – 35 minutes or until your marble cake is cooked through when tested with a skewer.
You can also find more great cake recipes in our ‘Cakes and Cheesecakes’ Ebook – also available in a Thermomix version.






Alex @ Doorstep Organics
I just love the way you made it so simple. This recipe of yours brings color my kids plates. And because of your idea, I came to think to add more color to it, 2 or 3, perhaps.