


Over the weekend we had our Mother’s Group Christmas Party. While you often hear Mother’s Groups copping some flack for being too competitive or cliquey, we have been really fortunate to have a group of beautiful and caring ladies and many strong friendships have formed. It’s our third Christmas together and from a small group with seven babies back in 2012, we’ve quickly grown to a group of 14 and there is no sign of the new arrivals slowing down anytime soon!
This has been the first year the kids have shown any interest in what has been going on, and they were more than a little excited to rip open their secret santa presents this year. It’s a pretty relaxed event, we have always held it at our place so the kids can run around, play in the cubby or have a swim while we all catch up and of course – eat.
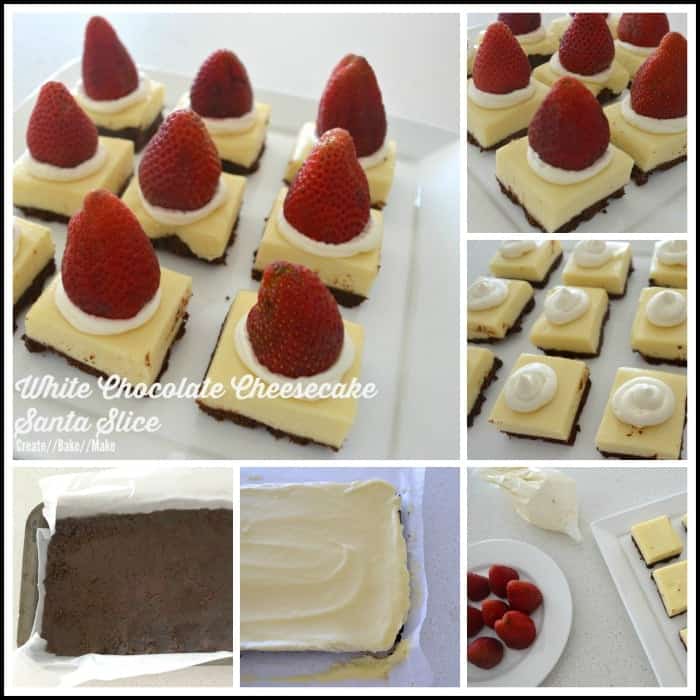
While everyone brings something along to share, I take the opportunity to bake a few different things and try out new recipes. I’d seen pictures of adorable Santa Cheesecake Slice floating around Pintrest and Facebook and was pretty confident I could replicate them using my favourite no bake white chocolate cheesecake recipe.
You will need:
200g of Chocolate Ripple Biscuits – or similar
80g of butter – melted
375g block of Cream Cheese – softened
½ cup of caster sugar
1 teaspoon of vanilla essence
1 cup of cream
3 teaspoons of powdered gelatine
¼ cup of boiling water
200g of white chocolate
150ml of thickened cream – extra for decoration
2 tablespoons of icing sugar
1 teaspoon of vanilla essence – extra
250g of strawberries – tops removed
Let’s put it together!
1. Cover the base and sides of an 18 x 28cm slice tin with baking paper – make sure to leave paper hanging over the sides.
2. Melt the white chocolate in the microwave – cooking for 30 second spurts and once melted set aside to cool slightly.
3. Add the gelatine to a cup of boiling water and stir to combine.
4. Crush 250g of Oreo cookies either in a food processor, or with using a rolling pin until they resemble fine crumbs. Add the melted butter and stir to combine. Press the crumbs in the base of the slice tin and place in the freezer to chill for 30 minutes.
5. Using an electric mixer, combine the cream cheese, sugar and vanilla essence until smooth. Add the cream and mix to combine.
6. Stir through the gelatine mixture and white chocolate.
7. Chop the remaining Oreos into large chunks and stir through the cheesecake mixture.
8. Spoon the mixture over the chilled base and refrigerate for 3 hours or until the slice has set.
9. While the cheesecake is setting, remove the stalks from the strawberries and using electric beaters, whip together the cream, icing sugar and extra vanilla essence. Pop into the fridge until required.
10. Remove the set cheesecake from the fridge and cut into small squares.
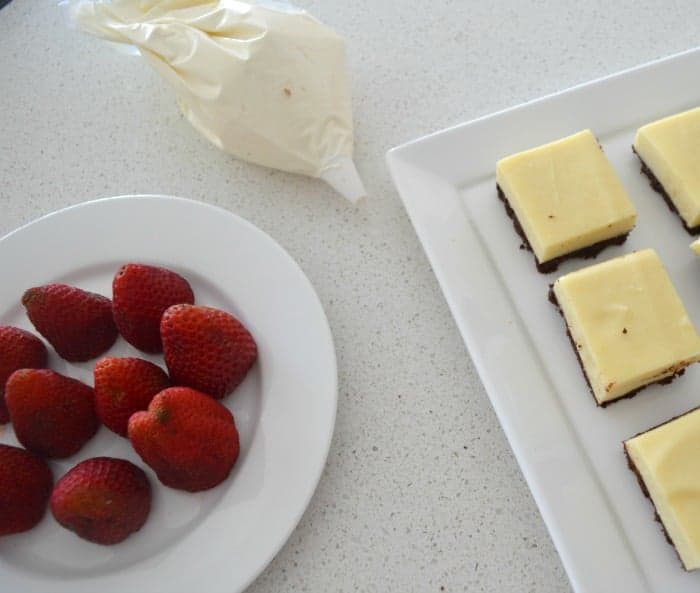
11. Fill a piping bar with the whipped cream and pipe some into the middle of each cheesecake square. Repeat until all squares have been topped with cream.
12. Place a strawberry on top of the cream to create ‘Santa’. Repeat until all squares have been topped with a strawberry.
Either serve immediately or refrigerate until needed.
Thermomix Instructions
1. Cover the base and sides of an 18 x 28cm slice tin with baking paper – make sure to leave paper hanging over the sides.
2. Place the chocolate ripple biscuits into the bowl and mix on speed 8 for 10 seconds.
3. Add the butter and cook for 30 seconds, 50 degrees, speed 2.
4. Press the biscuit base into the bottom of your prepared tin and place in the fridge to chill.
4. Add the gelatine to a cup of boiling water and stir to combine. Allow to cool.
5. In a clean thermomix bowl, insert the butterfly attachment and add the cream cheese, castor sugar, cooled gelatine mixture and cream and mix for 30 seconds on speed 1 reverse until you have a smooth consistency. Pour into a large mixing bowl and remove the butterfly insert.
6. Add the white chocolate and vanilla essence (you don’t need to wash the bowl) and chop it for 10 seconds on speed 8.
7. Scrape down the sides and melt the chocolate for 3 minutes at 5o degrees on speed 1.
8. Allow the mixture to cool for approximately 5 minutes.
9. Fold the white chocolate into the cream cheese mixture and spoon over the chilled biscuit base. Place in the fridge to set and follow above instructions from step 10 to decorate.
Enjoy!

Have you attended any Christmas parties yet?
What is your favourite cheesecake flavour?
Dee
Loving this recipe but it doesn’t say when to put the gelatine mixture in, in the Thermomix instructions? Or am I just completely missing it?
Lauren
Hi Dee, My apologies I had forgotten to add it! All fixed now x
Malinda @mybrownpaperpackages
You know what I love most about this recipe – I don’t have to turn the oven on during this hot weather 🙂
Nicole- Champagne and Chips
So many gorgeous Christmas ideas from you. This is just too cute, I wish i had more things on to take all your ideas to 🙂
laurenm83
Oh thank you Nicole! It’s one of the benefits of being busy I guess!
Kate @rosehipsrhubarb
I saw these in pinterest a couple of days ago and thought I might make them for Christmas day. Your white chocolate version looks gorgeous, although I’ll have to make them the old-fashioned way without a Thermomix. It’s great that you share two sets of instructions.
laurenm83
You’ve got to love Pintrest for great christmas recipe ideas! It’s only a recent addition, and it certainly won’t be replacing my ‘regular’ recipes.
Aroha @ Colours of Sunset
These look divine! Saving this page so I can go home and give it a go in my thermie! Just got it a week and a bit ago so still a learning curve!
laurenm83
I hope you enjoy it! I only got mine two weeks ago now, it really is a learning curve but I’m enjoying it!
Bec
Can I come next year?! I’ll have a baby and fly to Brisbane.. just to eat those white chocolate santas!! Haha, no. But seriously, they look amazing! x
laurenm83
Of course! The more the merrier!
Sammie @ The Annoyed Thyroid
These look adorable and you’re on fire with that Thermomix! Love it!
laurenm83
Thanks lovely! It’s certainly getting a good workout!