


You are going to love these Cauliflower Fritters with Bacon and Cheese – they are the perfect simple midweek dinner or snack and they are also perfect for lunch boxes too!
These light and crispy Cauliflower Fritters with Bacon and Cheese really are the perfect easy dinner or snack. This recipe will make around 24 fritters (you can certainly make them smaller to make the batch go further) and they are also freezer friendly.
Cauliflower Fritter Ingredients:
- Cauliflower
- Zucchini
- Parmesan and Tasty (Cheddar) Cheese
- Bacon
- Self-Raising Flour – you can also use Gluten Free if you wish
- Onion Flakes
- Garlic
- Salt and Pepper
- Water
To cook, I like to use either olive oil or ghee in my frying pan. You will need to add approximately ½ tablespoon of your choice of oil after every 2 – 3 batches of fritters cooked.

How to Make Cauliflower Fritters:
Making these Fritters is very easy, you simply need to:
- Chop, grate and crush all of your ingredients and place into a bowl.
- Lightly whisk the eggs and add to the bowl along with half of the water specified. Mix well and add extra water and needed until you get a soft consistency.
- Use a ¼ measuring cup to scoop up the mixture and place into your frying pan. Cook for 3 – 4 minutes on one side before flipping and cooking for a further 2 minutes on the other side.

My Tips for Making these Cauliflower Fritters with Bacon and Cheese:
- If you don’t have quite enough cauliflower when making this recipe, just cut back a little on the water you add at the end. I’ve made it with varying amounts of cauliflower, ranging between 550 – 700g and have used between ½ a cup to ¾ of a cup of water each time.
- The mixture is quite wet at the end, but as long as you let the Fritters cook for 4 – 5 minutes before flipping them, they will stay together. You can also pop any leftovers into the freezer for another time (haha!) and simply reheat them for around 10 – 12 minutes on 190 degrees.
- For a vegetarian option, simply omit the bacon from this recipe.
More Delicious Cauliflower Recipes:
- Cauliflower and Cheese Nuggets
- Pumpkin Cauliflower Soup
- Cheese and Cauliflower Fritters
- Cauliflower Soup
- Bang Bang Cauliflower

Cauliflower Fritters with Bacon and Cheese
Equipment
- Frying Pan
Ingredients
- 600 grams cauliflower leaves removed and cut into small florets.
- 1 medium zucchini approximately 120g- grated
- 4 rashers short cut bacon cut into small pieces
- 2 cups self raising flour 300 grams
- 1 cup parmesan cheese finely grated – 100 grams
- ½ cup tasty cheese grated – 50 grams
- 1 garlic clove crushed
- 1 teaspoon onion flakes
- 2 eggs lightly beaten
- ¾ cup water
- pinch salt
- pinch pepper
- 2 tablespoon olive oil to cook with
Instructions
- Place the cauliflower florets into a food processor and blitz until they turn into small pieces. Transfer to a large bowl.
- Add the crushed garlic, onion flakes, grated zucchini, chopped bacon, parmesan cheese and tasty cheese to the bowl with the cauliflower and add the self raising flour before stirring well to combine.
- Beat the eggs in a small bowl lightly with a fork and add salt and pepper to taste. Add the eggs along with ¼ cup of water to the bowl with the cauliflower mixture and stir. Gradually add the extra water and stir until you have a thick batter – please note you may not need all of the water depending on the size of the cauliflower and zucchini that you used.
- Heat a tablespoon of olive oil in a large frying pan over a medium to high heat and use a ¼ measuring cup to scoop up the batter and place the fritter mixture into your pan. Use a spoon to gently spread the mixture into a circle between ½cm – 1cm thick. You should be able to fit approximately six fritters (or even more depending on the size of your pan) into your frying pan.
- Cook the Cauliflower Cheese and Bacon Fritters for 5 minutes on each side until they are crisp and golden brown before transferring to a plate and covering them with foil so they stay warm while you cook the next batch. Repeat until all the Cauliflower Cheese and Bacon Fritters have been cooked.
Thermomix Instructions
- Place the parmesan and tasty cheese which has been cut into 3cm chunks into your Thermomix bowl and mix for 7 seconds on speed 9 to grate. Transfer to a separate bowl until needed.
- Without washing the bowl, add the Zucchini (which has been cut into 3cm pieces) and bacon into your Thermomix bowl and mix for 4 seconds on speed 6. If you would like it cut into smaller pieces, mix for a further 2 seconds. Transfer to the bowl with the grated cheese.
- Without washing the bowl, add the cauliflower florets, garlic clove and onion flakes to your Thermomix bowl and mix for 7 seconds on speed 8 or until they resemble rice. If there are still large pieces in your Thermomix bowl, scrape the sides and blitz for a further 3 seconds on speed 6.
- Add the grated cheeses, bacon and zucchini, along with 2 eggs, 300g of self raising flour, and HALF a cup of water to your Thermomix bowl in that order – please note you may not need all of the water depending on the size of the cauliflower and zucchini that you used.. Mix for 15 seconds on speed 4 REVERSE to combine the ingredients. Scrape down the sides of the bowl and if your mixture is still a little dry, add the remaining ¼ cup of water and mix for a further 15 seconds on speed 4 REVERSE or until combined.
- Heat a tablespoon of olive oil in a large frying pan over a medium to high heat and use a ¼ measuring cup to scoop up the batter and place the fritter mixture into your pan. Use a spoon to gently spread the mixture into a circle between ½cm – 1cm thick. You should be able to fit approximately six fritters (or even more depending on the size of your pan) into your frying pan.
- Cook the Cauliflower Cheese and Bacon Fritters for 5 minutes on each side until they are crisp and golden brown before transferring to a plate and covering them with foil so they stay warm while you cook the next batch. Repeat until all the Cauliflower Cheese and Bacon Fritters have been cooked.
Notes
- You may not need all of the water specified in the recipe, as the water content of the vegetables will vary
- These Fritters are freezer friendly.
Nutrition
Looking for more savoury ideas? Grab your copy of Snack Attack, available in both regular and Thermomix versions from our eBook store.
Pamela
Substitute for bacon so they are meat free
Lauren Matheson
You can just leave the bacon out.
Lesley Fuller
Lesley
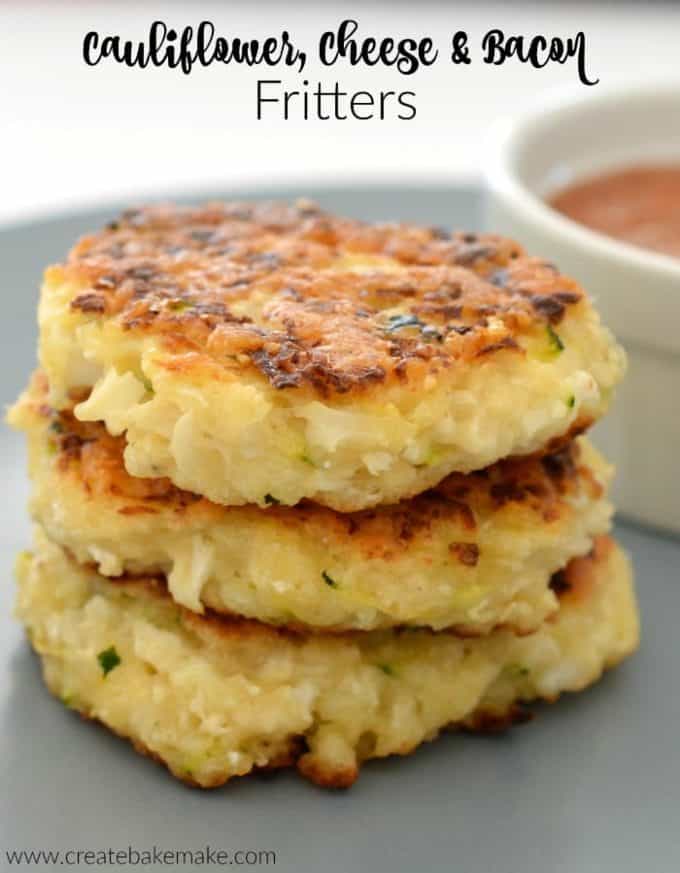
Nancy Suich
What are the fritters topped with in the photo???
Lauren Matheson
Hi Nancy, it is a tomato relish 🙂
Skye
Hi there,
Thanks so much for the recipe it looks delicious and I can’t wait to make them. I am wandering do you think I could bake them instead of frying them? I’m hoping I can bake them in little cupcake pattys for the kids to take to school.
Lauren Matheson
I think you can definitely bake them. I’d probably pop them onto a tray with baking paper rather than paper cases just in case they stick x