


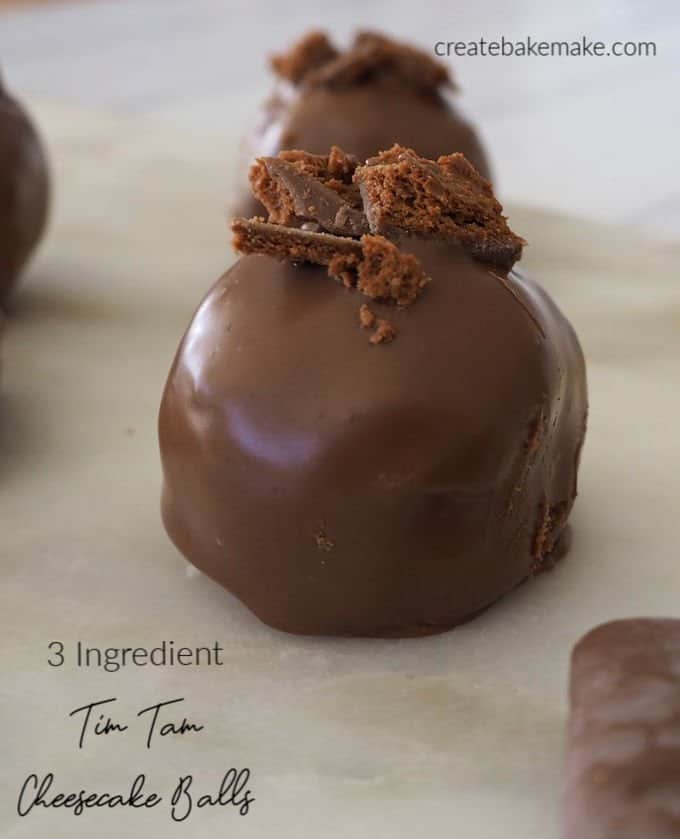
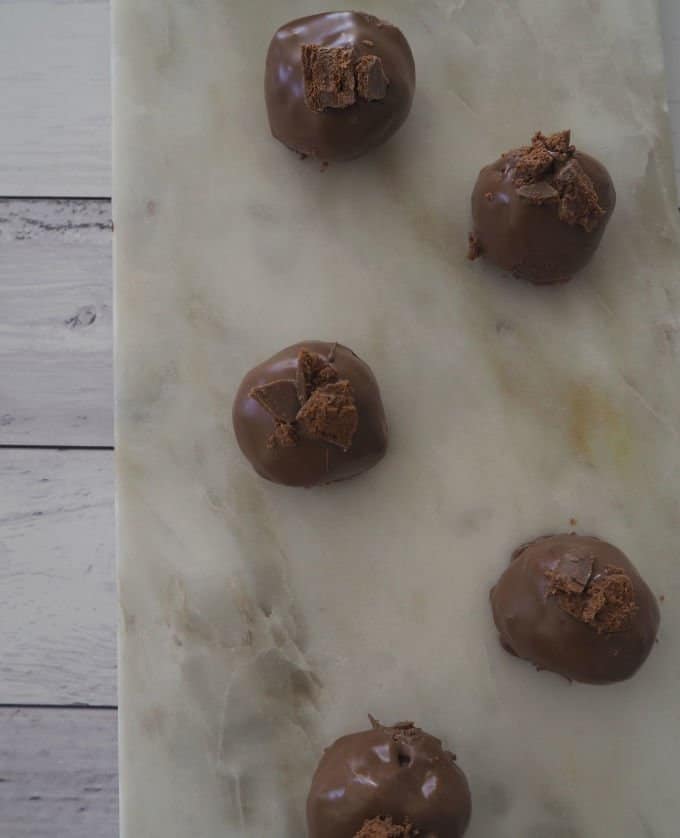
For a simple no bake dessert, you can’t go past these 3 Ingredient Tim Tam Cheesecake Balls!
I’ve been hearing for awhile now just how good (and easy to put together) Tim Tam Cheesecake Balls are, and I thought it was about time I tried them out for myself. Last night it was our boys Kindy Christmas party – the perfect excuse to make a Christmas themed batch of these little beauties to give to their Teachers as a gift – as well as keeping one (or two!) aside for me to try!
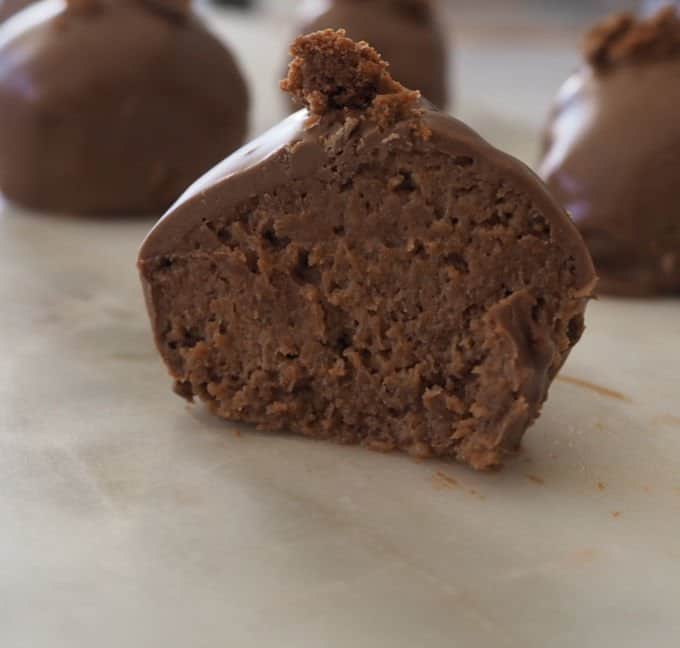
These Tim Tam Cheesecake Balls need just three ingredients to create, and oh my goodness, they are just amazing. While they didn’t look very attractive before being coated in the melted chocolate (I decided to spare you that photo!) they more than made up for it with their creamy, chocolate and distinct Tim Tam taste.
Tips for Making these 3 Ingredient Tim Tam
Cheesecake Balls
- It’s important to chill the cheesecake mixture before attempting to roll into balls, if the mixture is too warm, it will melt in your hands and not form a ball.
- You also need to chill these cheesecake balls well before coating in the melted chocolate. I find it best to pop them into the freezer for half an hour.
- I used one pack of Tim Tams for the cheesecake mixture and then used a few extra Tim Tams from a second pack to decorate.
- You will need 1 ½ blocks of milk chocolate for this recipe.
- To store, place into an airtight container and keep in the fridge for up to one week.
You can watch how to make these Tim Tam Cheesecake Balls here:

You can find more easy chocolate recipes in our Thermomix Chocolate book, you can check out all of our books and products here.


Tim Tam Cheesecake Balls
Ingredients
- 200 grams pack of Tim Tams plus extra to decorate
- 250 grams cream cheese softened
- 300 grams milk chocolate
Instructions
- Line a baking tray (or plate) with baking paper and set aside until needed.
- Using a food processor, blend until the Tim Tams are crumbs.
- Add the softened cream cheese and blend until combined.
- Place the mixture into the fridge for a minimum of 30 minutes to chill
- Roll the mixture into balls (I made mine dessert spoon sized) and place on tray. Continue until all the mixture has been used.
- Place tray/plate into the freezer for a minimum of half an hour, you want the ball to be very firm.
- Break the milk chocolate into pieces and place in a microwave safe bowl to melt (you can also melt the chocolate in a bowl sitting above a saucepan on boiling water on the stove). I cook the chocolate for 30 second spurts until it's almost melted and then mix until it's completely melted.
- Remove the balls from the freezer. Poke a skewer into the bottom of the balls and dip them in the melted chocolate. Place on a wire rack to set. Repeat until all the balls are coated.
- Optional - decorate the balls while the chocolate is still soft with sprinkles, hundreds and thousands or even melted white chocolate.
- Put the balls into the fridge for half an hour, or until the milk chocolate has set.
Notes
Nutrition
Thermomix Tim Tam Cheesecake Balls Recipe
- Line a baking tray (or plate) with baking paper and set aside until needed.
- Place the Tim Tams in Thermomix bowl and blitz for 5 seconds on speed 7.
- Scrape down the sides of your Thermomix bowl and add the softened cream cheese to the bowl and blitz for 10 seconds on speed 5. Scrape down the sides of your Thermomix bowl and mix for a further 6 seconds, speed 4 or until combined – it may take a little longer if your cream cheese isn’t completely soft.
- Place the mixture into the fridge for a minimum of 30 minutes to chill.
- Break the milk chocolate into pieces and place in a microwave safe bowl to melt (you can also melt the chocolate in a bowl sitting above a saucepan on boiling water on the stove). I cook the chocolate for 30 second spurts until it’s almost melted and then mix until it’s completely melted.
- Remove the balls from the freezer. Poke a skewer into the bottom of the balls and dip them in the melted chocolate. Place on a wire rack to set. Repeat until all the balls are coated.
- Optional – decorate the balls while the chocolate is still soft with sprinkles, hundreds and thousands or even melted white chocolate.
- Put the balls into the fridge for half an hour, or until the milk chocolate has set.
Margaret Debono
Do you use cooking chocolate or normal chocolate? TIA
Lauren Matheson
Hi Margaret, I prefer to using normal chocolate.
Jodie
They sound delicious! Just about to make these, can they be frozen to store them?
Tisha
Perfect, and so easy to make. I rolled them in coconut instead of coating them in chocolate which was even faster and cheaper.
Thank you for a brilliant recipe.
Sharon
Oh yum they sound so good and I love that they are so easy to make! I wonder what they would taste like with a dark chocolate coating? Thanks for linking up with Mummy Mondays #Team MM
laurenm83
They would be great with dark chocolate too Sharon. You’ve just given me an idea!
Julie
What a great idea. Gotta love a Tim Tam in a cheesecake
laurenm83
Thanks Julie, Tim Tams really are the ultimate 🙂
Bec @ The Plumbette
Anything with Tim Tams and I am THERE! These look divine and I bet they taste it too. I need to get a food processor, It makes making things like this so much easier.
laurenm83
Haha, I love your enthusiasm. You just can’t go wrong with Tim Tams! I’ve never had a food processor before I recently got our Thermomix, I think there is something quite therapeutic about crushing (bashing) biscuits with a rolling pin 😉