


My Nan always makes a batch of Jelly Cakes with Cream for special occasions but given she lives so far away I thought it was time to try making them for myself!
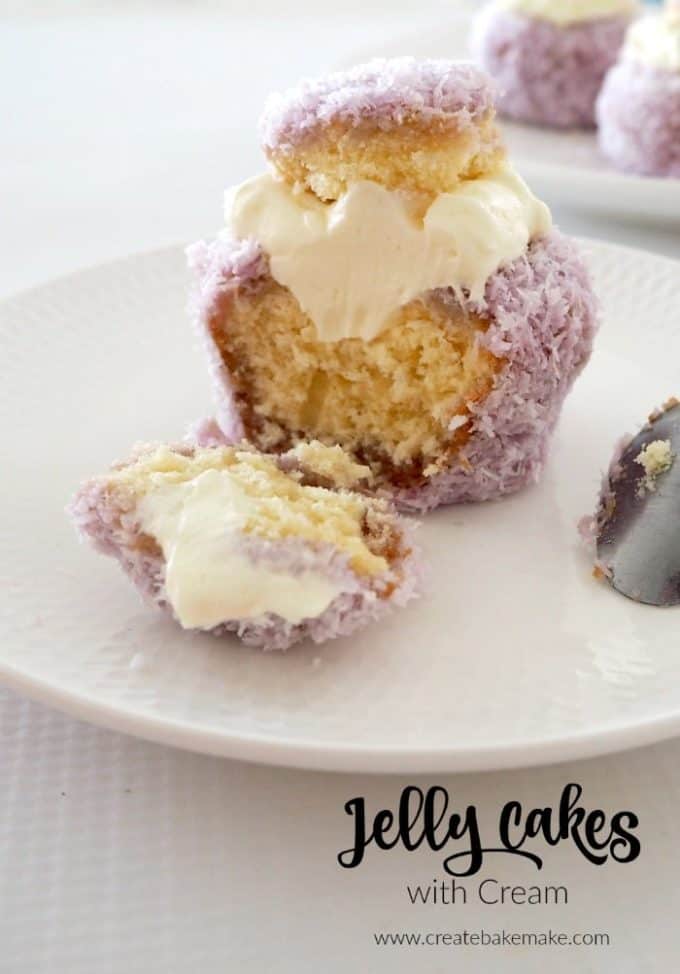
Even to this day Nan still regularly makes a batch of Jelly Cakes with Cream for birthdays, special occasions or simply whenever my sister asks for some! This recipes is slightly different to hers (she uses a traditional sponge recipe) as I’ve used my favourite soft and fluffy vanilla cupcake recipe to make these Jelly Cakes instead, but if you ask me they are still all kinds of amazing!
We made a batch of these Jelly Cakes with Cream earlier in the year when my Mum was visiting us, as she was able to keep an eye on the three boys for me while I put these together. Since then, the boys have requested these ‘pink cakes’ a few times and they’ve quickly become a favourite.
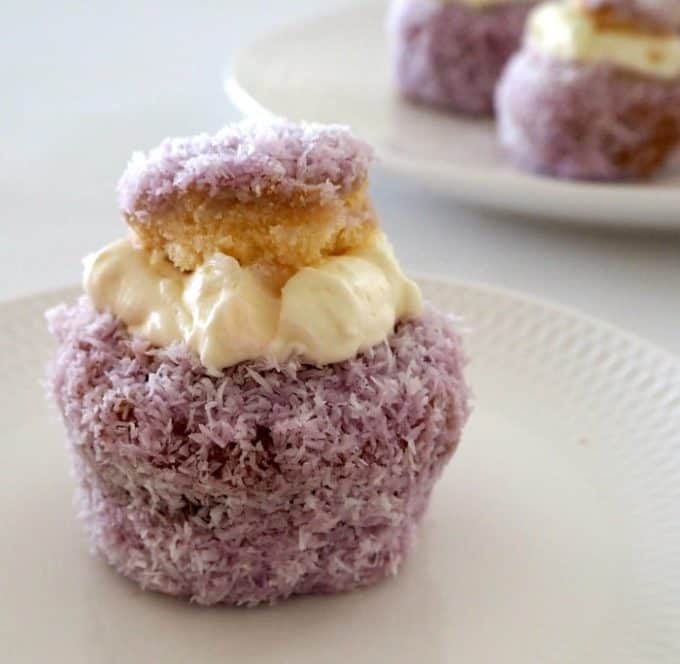
By using a vanilla cupcake recipe to make these Jelly Cakes, they will hold up a little better than a fragile sponge when it comes time to dip them in jelly and roll in coconut. If you are wanting an extra thick layer of jelly and cream, dip and roll them twice to ensure your cake is coated thickly. Otherwise it’s completely fine to just dip and roll them just the once.
You can also add a little strawberry jam to the inside of your cake prior to filling it with cream if you like and this gives you a yummy surprise as you bite into the Jelly Cakes.

Jelly Cakes with Cream
Ingredients
- 125 g butter - softened
- ⅔ cup 160g of caster sugar
- 1 ½ 225g cups of self raising flour
- ½ cup milk
- 2 teaspoons of vanilla extract
- 2 eggs
- 85 g packet raspberry jelly crystals
- 1 cup boiling water
- 1 cup cold water
- 3 cups desiccated coconut
- 200 ml of thickened cream
- 1 teaspoon of icing sugar
- ½ teaspoon of vanilla essence
Instructions
- Preheat the oven to 180 degrees, and line 2 cupcake tins with paper cases.
- Put the softened butter, caster sugar, flour, milk, vanilla and eggs in a bowl and beat with electric beaters on a low speed for 2 minutes or until well mixed
- Increase speed and beat for a further 2 minutes or until smooth and pale
- Spoon mixture in to the prepared cupcake tins and bake for 18 -20 minutes or until golden and cooked through.
- Allow to cool completely on a wire rack
- While the cupcakes are cooling you can make the whipped cream. Place the thickened cream, vanilla essence and icing sugar into a small bowl and whip with an electric hand mixer until soft peaks form. Cover and place in the fridge until needed.
- In a medium bowl, add the jelly crystals and boiling water and mix until the jelly crystals have dissolved. Add the cold water and stir through. Place the Jelly into the fridge for an hour or until it's cold and has started to thicken slightly.
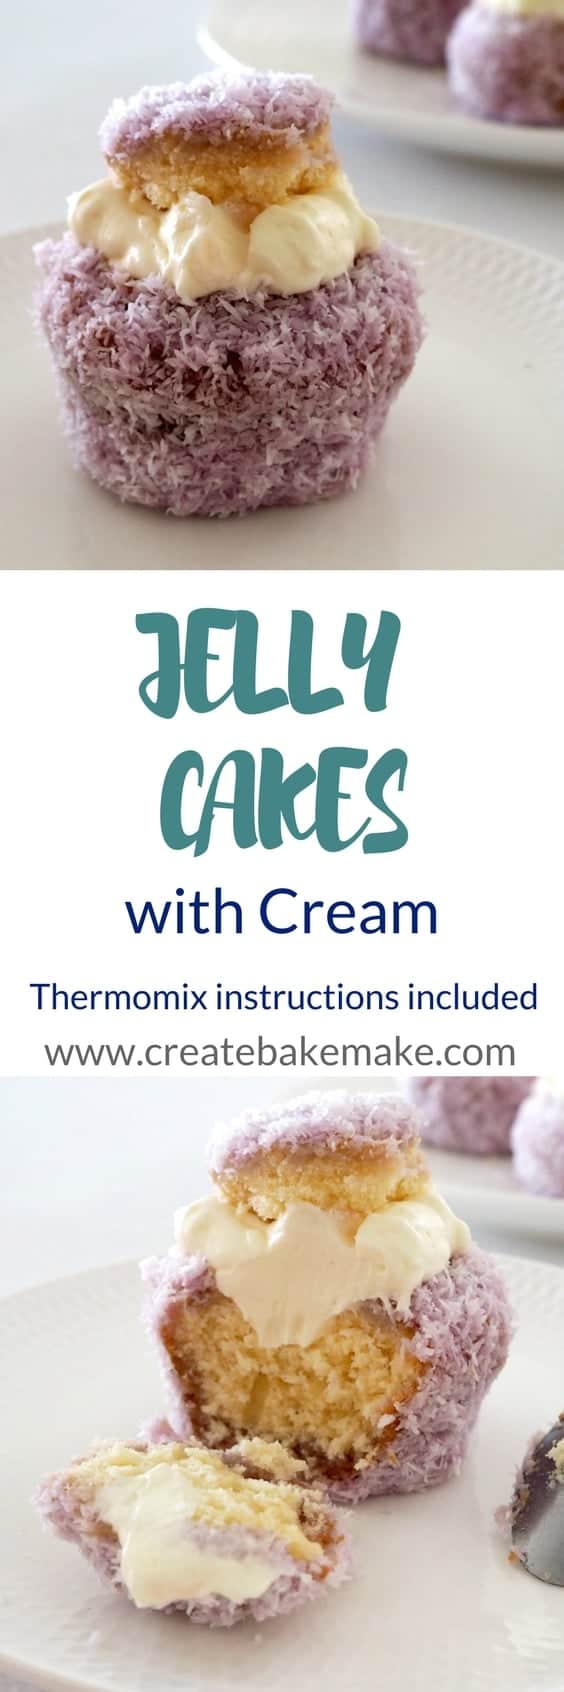
- Once the cakes have cooled completely, place the coconut into a bowl and remove the jelly and whipped cream from the fridge. Using a slotted spoon, lower each of the cupcakes into the jelly mixture. Allow the excess jelly to drain off before tossing the cupcake in the coconut. Place onto a wire rack. Repeat until you have used all of your cupcakes and place them into the fridge for half an hour to set.
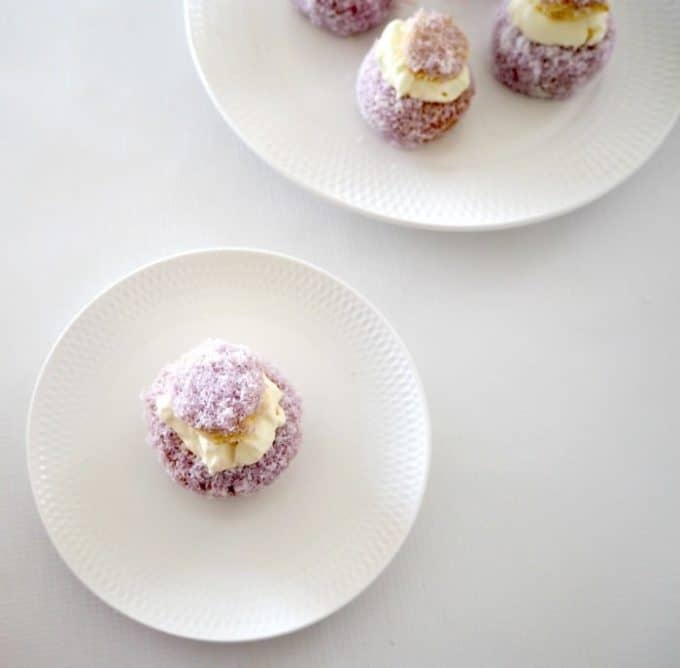
- Once set, use a teaspoon to remove a small circle from the top of the Jelly Cake and add some whipped cream. Repeat until all of the cakes have been decorated.
Nutrition
Thermomix Jelly Cakes with Cream Recipe
- Preheat the oven to 180 degrees, and line 2 cupcake tins with paper cases.
-
Place the flour, softened butter, sugar, vanilla extract, milk and eggs into your Thermomix bowl. Mix for 10 seconds on speed 4 before scraping the sides and mixing for a further 5 seconds on speed 4 or until the mixture is pale and smooth.
- Spoon mixture in to the prepared cupcake tins and bake for 18 -20 minutes or until golden and cooked through.
- Allow the cupcakes to cool completely on a wire rack
- While the cupcakes are cooling you can make the whipped cream. Place the thickened cream, vanilla essence and icing sugar into a small bowl and whip with an electric hand mixer until soft peaks form. Cover and place in the fridge until needed.
- In a medium bowl, add the jelly crystals and boiling water and mix until the jelly crystals have dissolved. Add the cold water and stir through. Place the Jelly into the fridge for an hour or until it’s cold and has started to thicken slightly.
- Once the cakes have cooled completely, place the coconut into a bowl and remove the jelly and whipped cream from the fridge. Using a slotted spoon, lower each of the cupcakes into the jelly mixture. Allow the excess jelly to drain off before tossing the cupcake in the coconut. Place onto a wire rack. Repeat until you have used all of your cupcakes and place them into the fridge for half an hour to set.
- Once set, use a teaspoon to remove a small circle from the top of the Jelly Cake and add some whipped cream. Repeat until all of the cakes have been decorated.
Enjoy!
For more yummy recipes, make sure you check out our ‘Cakes and Cheesecakes for All Occasions‘ eBook – also available in a Thermomix version. You can browse all of our ebooks here.
Leave a Reply